Start a project
← All projects

Case study · Scala Tower, Business BayTwo apartments.
One penthouse.

At Scala Tower, Business Bay, ARIA converted two apartments into one penthouse: structural openings, new MEP and modern sanitary fittings, with consultant and authority approvals.

Our site team photographed the rooms before and during the works. Here they are room by room, from the first strip-out to the finished spaces, with a short note on what changed.
  • Structural
  • MEP
  • Approvals
  • Joinery
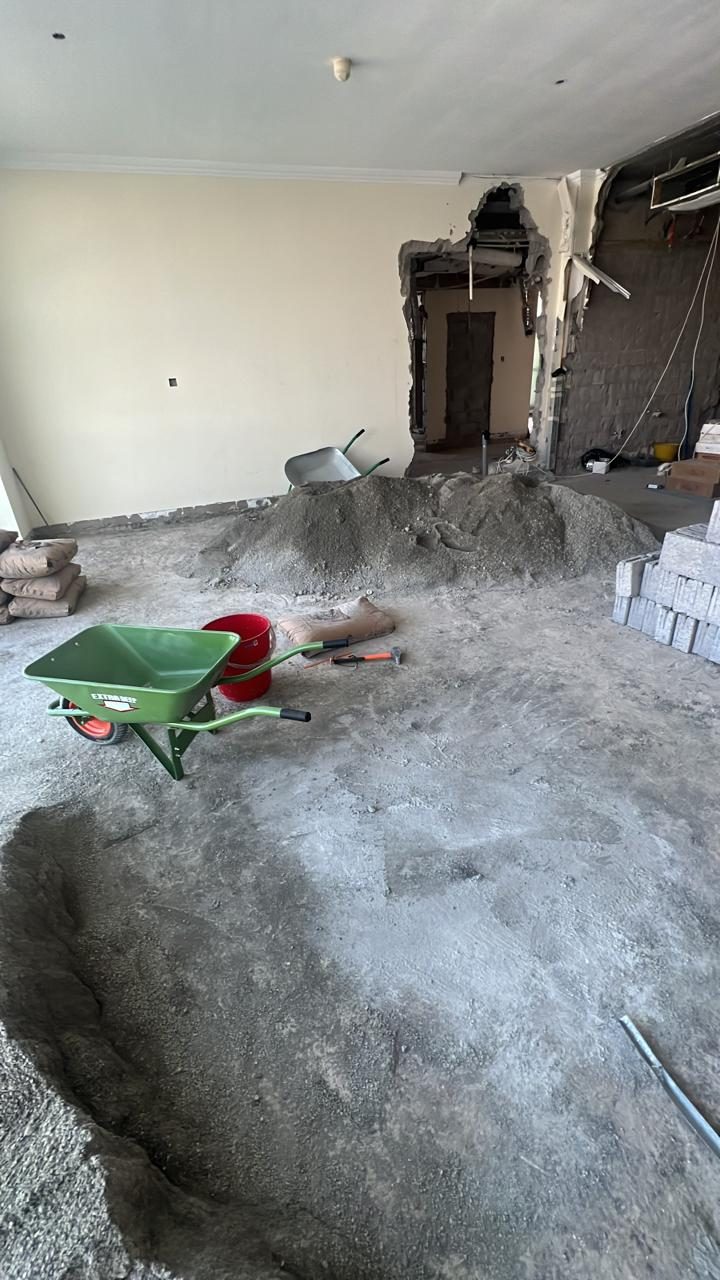
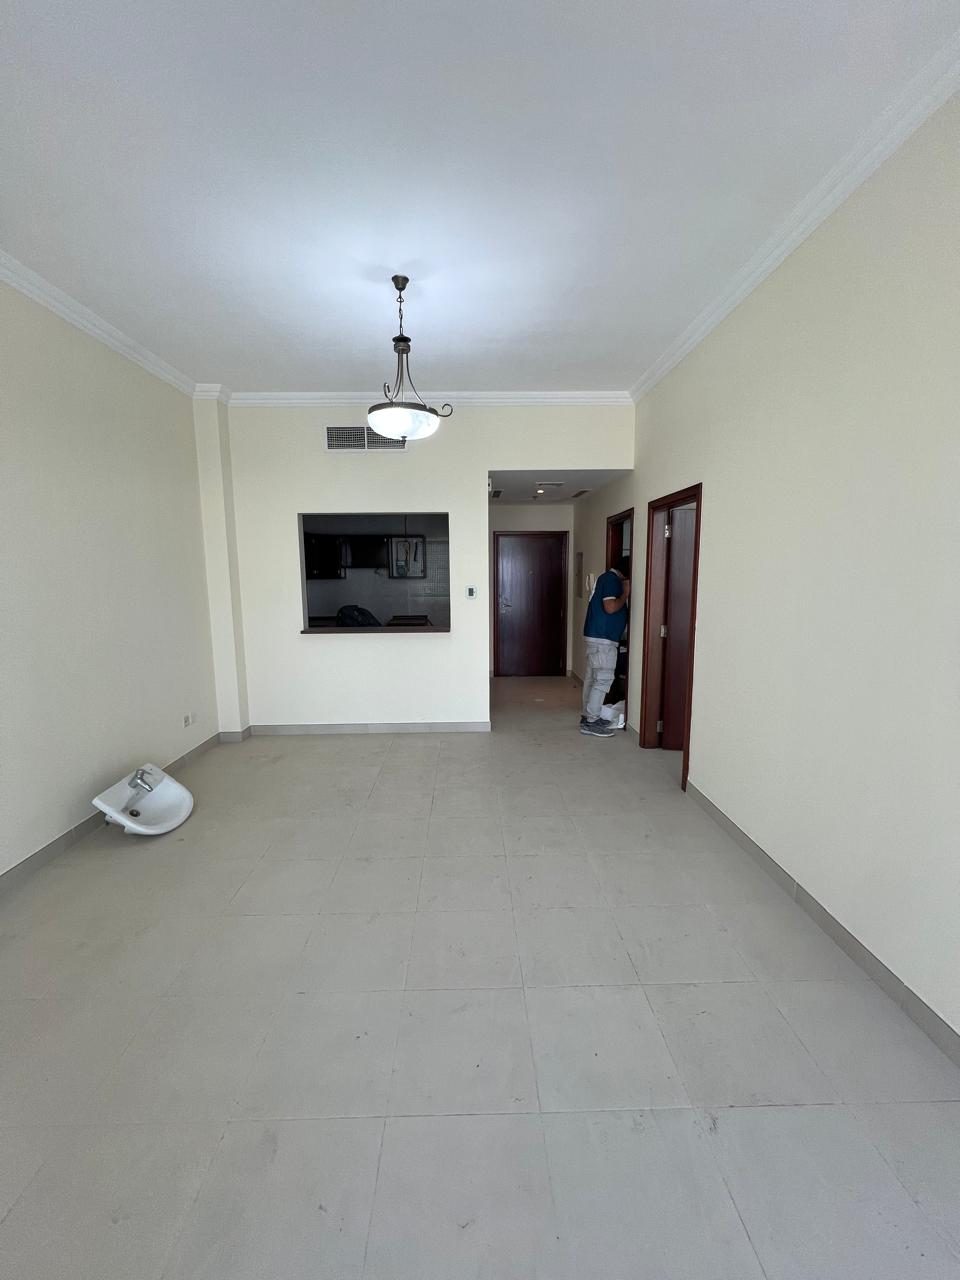
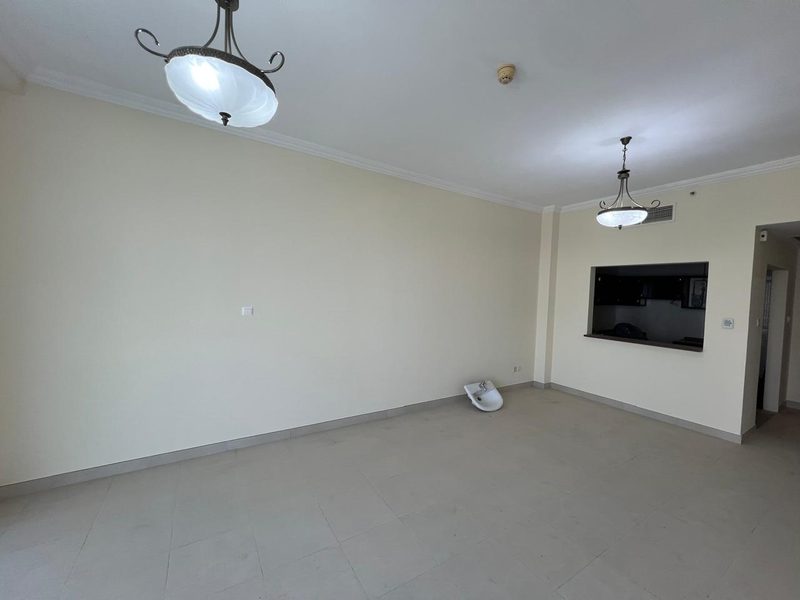
Living room before the works: plain cream walls, pendant lights and a serving hatch through to the old kitchenBefore
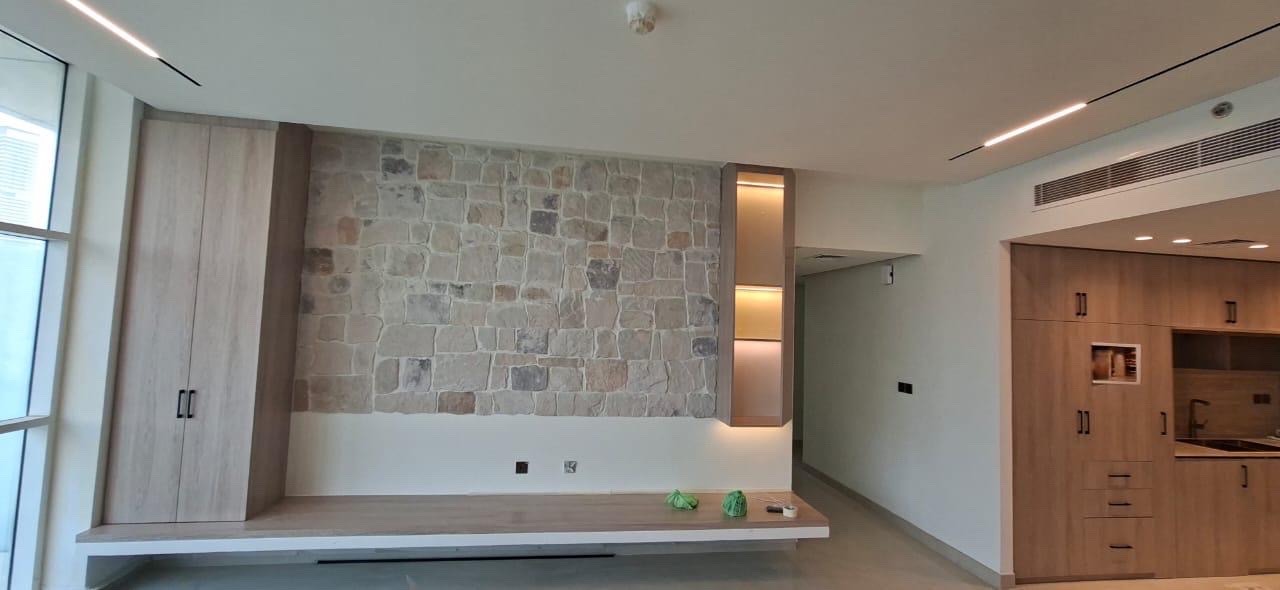
Living room wall clad in rough-cut natural stone with a floating oak bench and lit oak nicheAfter

Living room. The walls on the right and in front came down; the wall on the left became the stone wall, shown here face-on.

2apartments in
1penthouse out
10rooms shown
40real project photos

Living room & stone wall

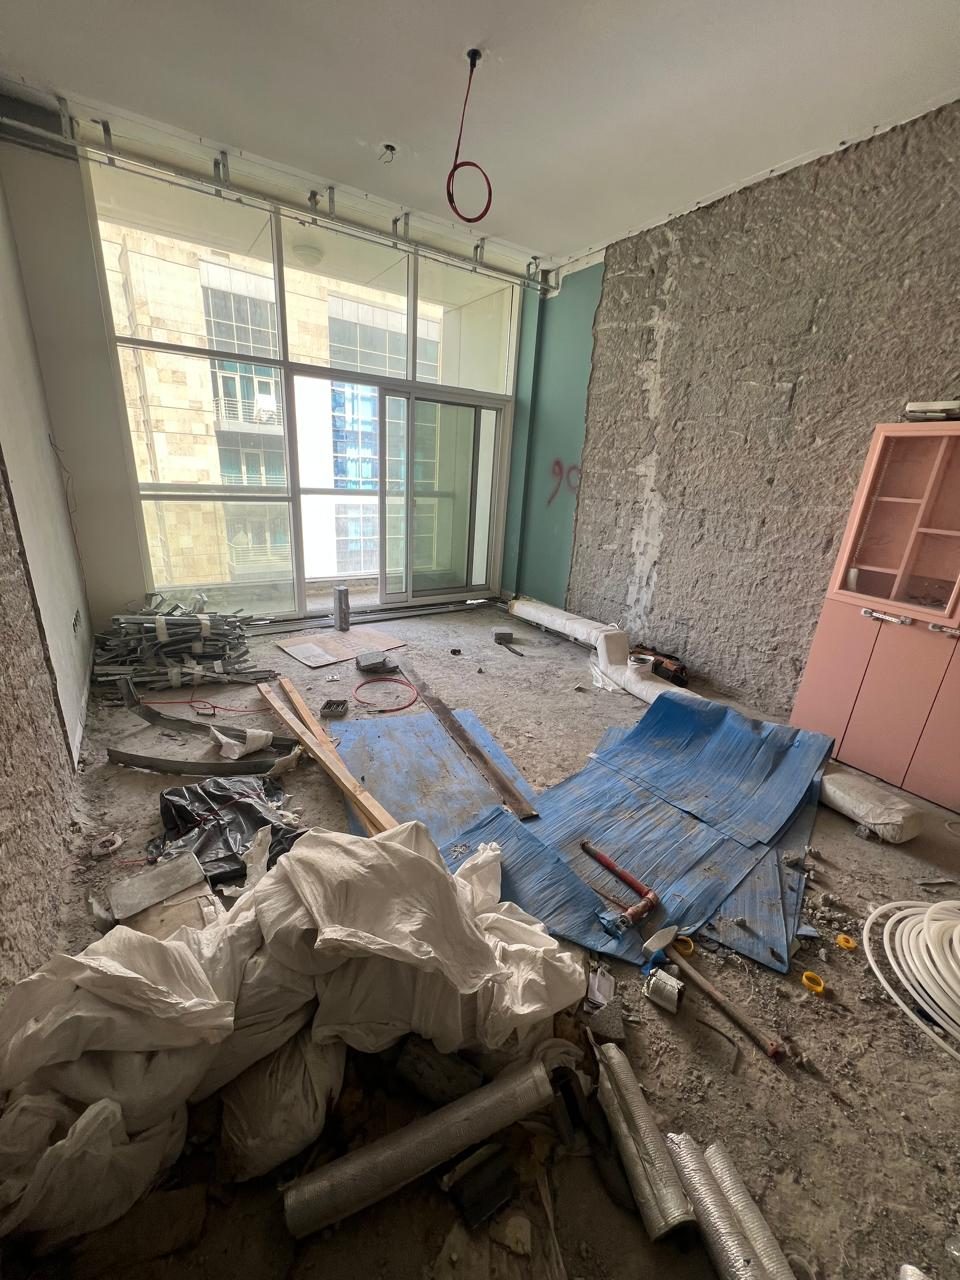
We took down the walls on the right and in front of the old living room. The rough wall on the left became the stone feature wall, with the new corridor opening in the middle and the kitchen on the right.
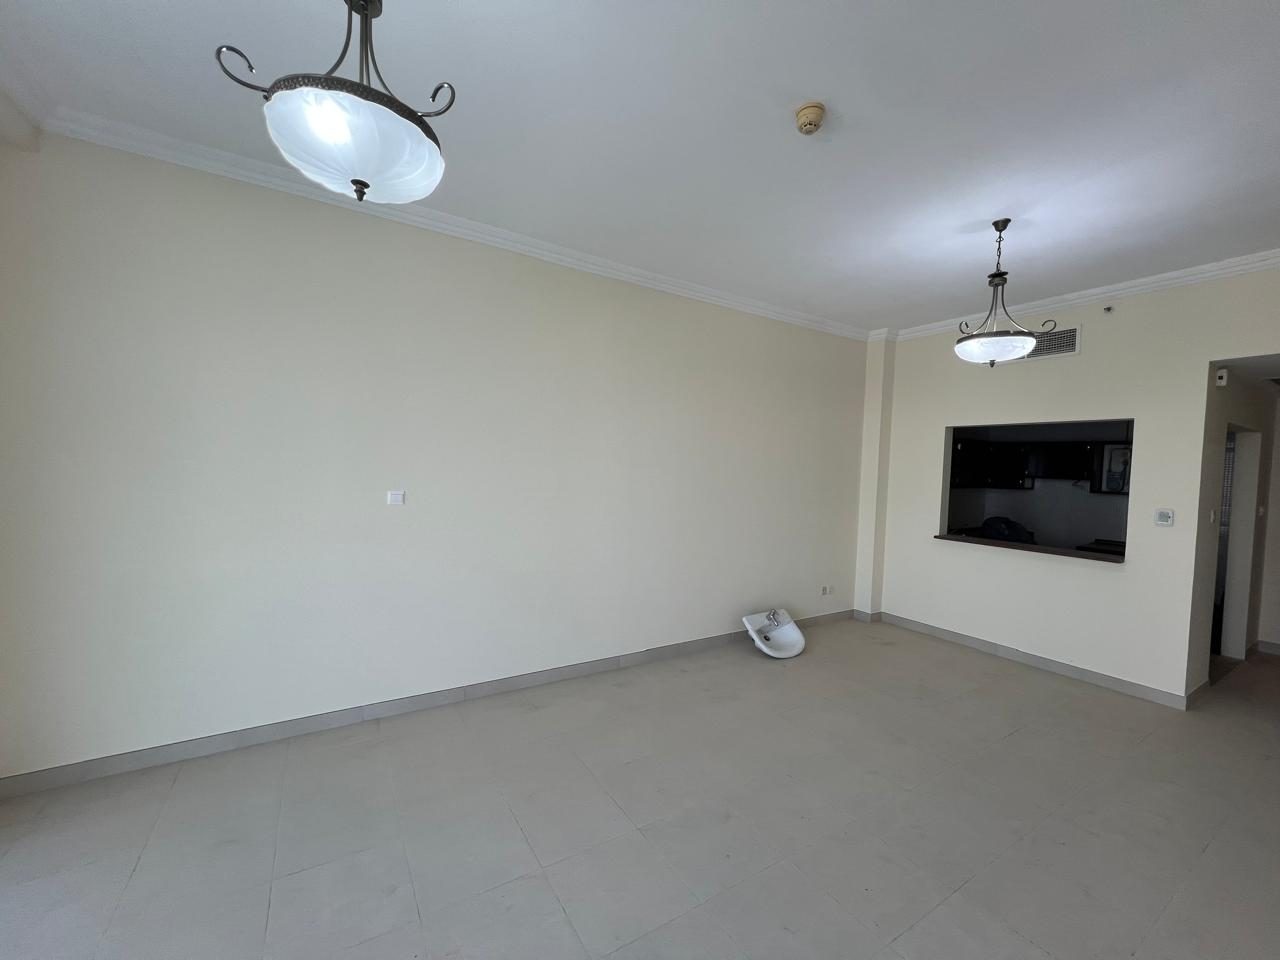
Living room before the works: plain cream walls, pendant lights and a serving hatch through to the old kitchenBefore
We took down the walls on the right and in front. The stone wall now runs along the left, with the kitchen on the right.
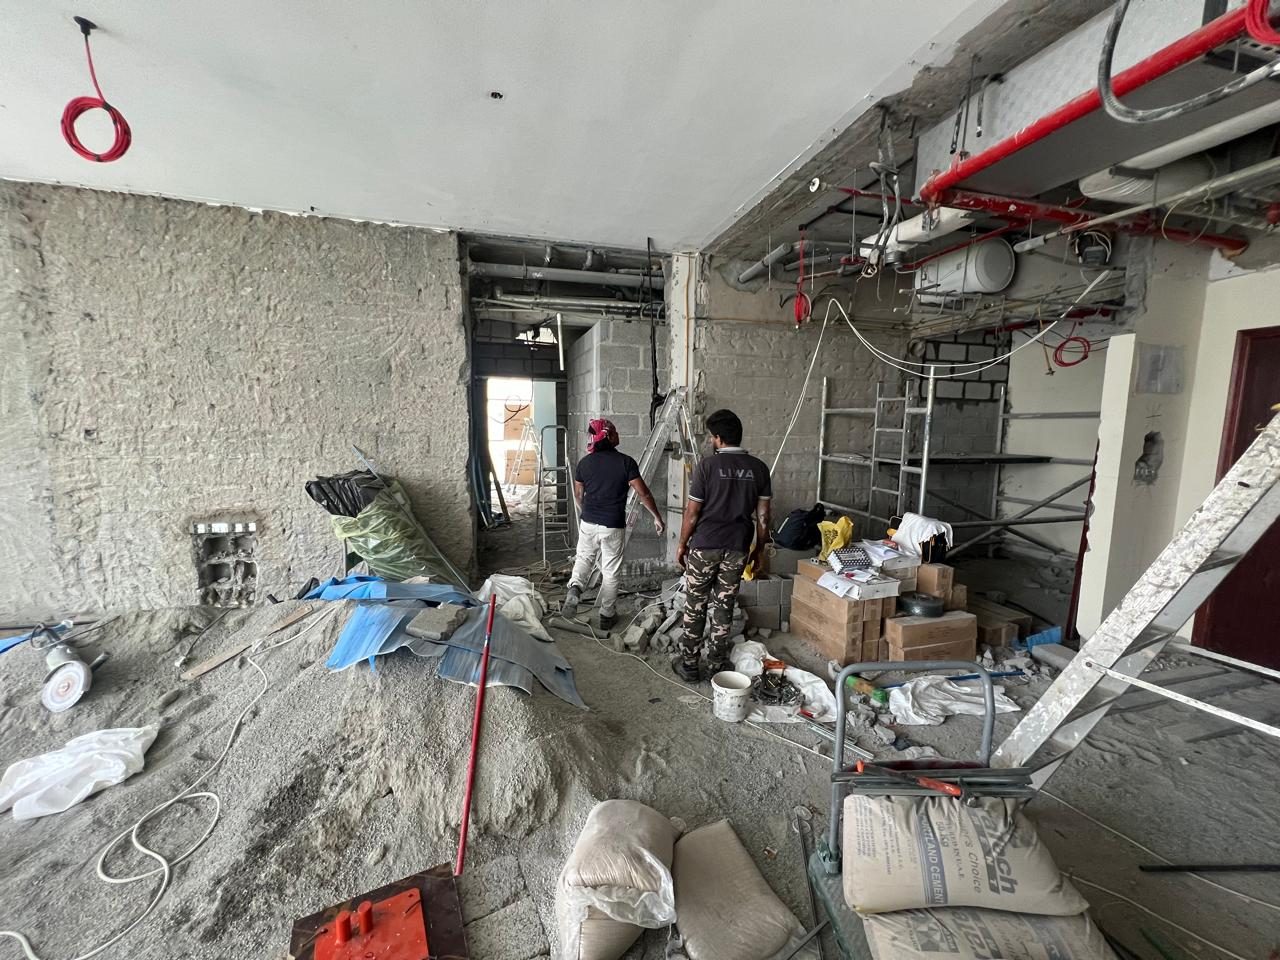
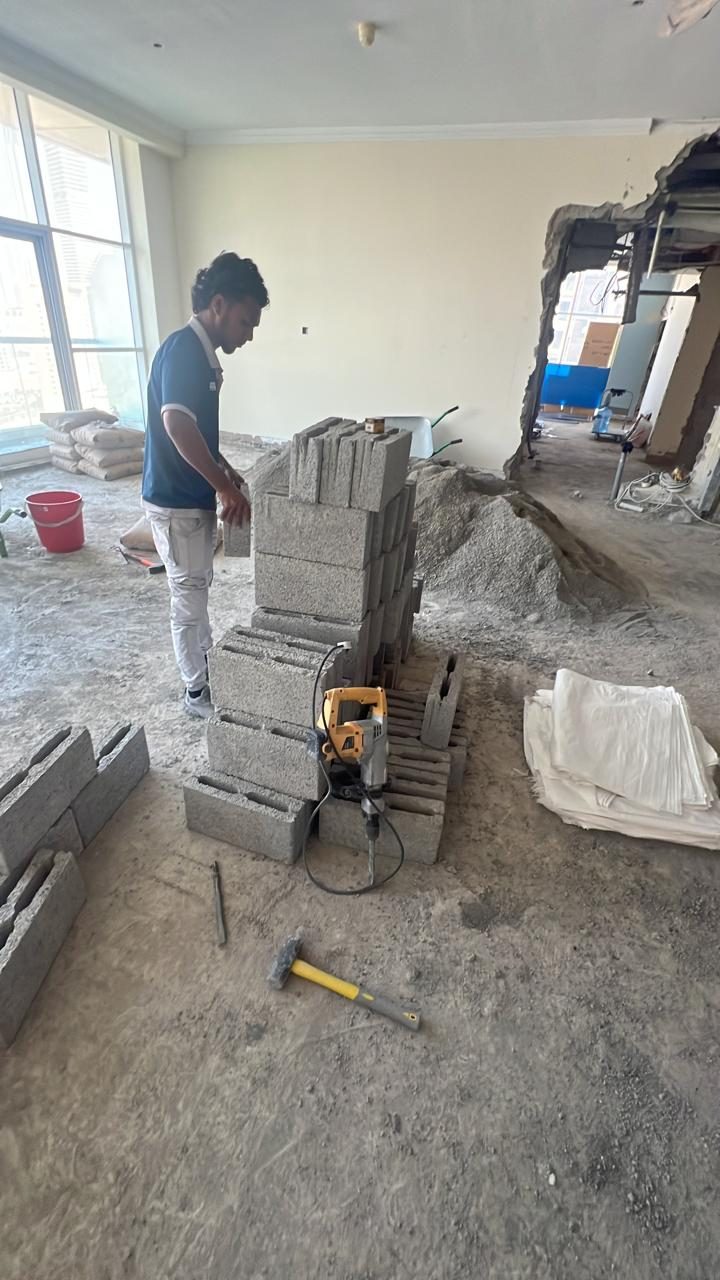
Living area during strip-out, walls opened for the corridor and kitchenStrip-out
Walls opened up: the stone wall goes on the left, the corridor in the middle and the kitchen on the right.
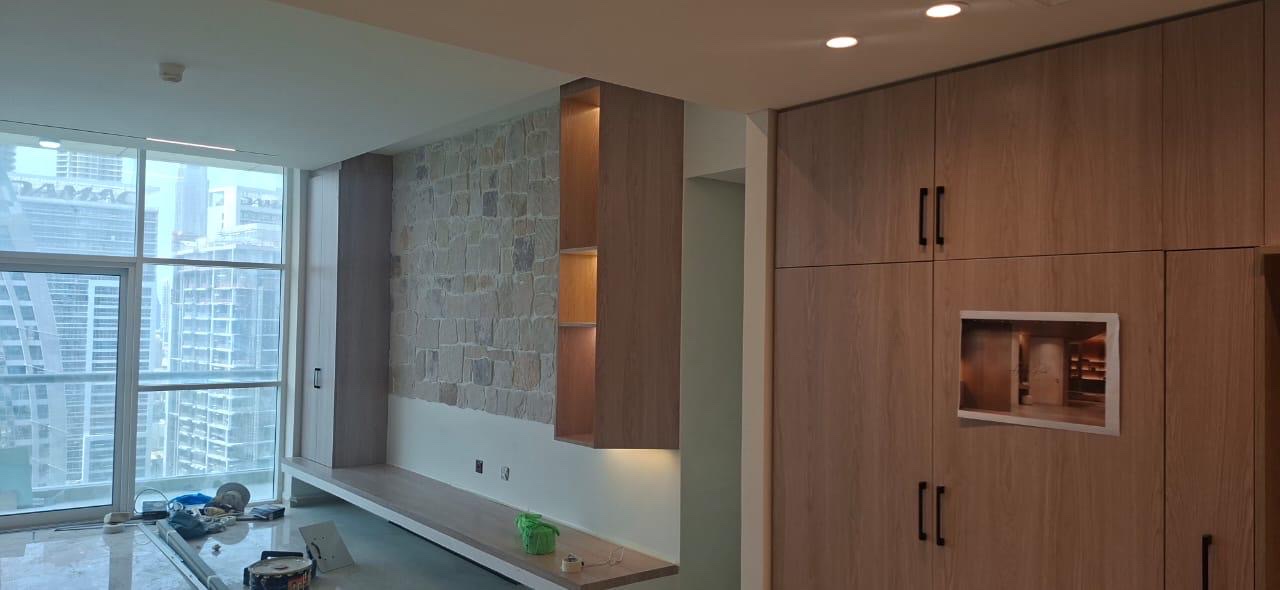
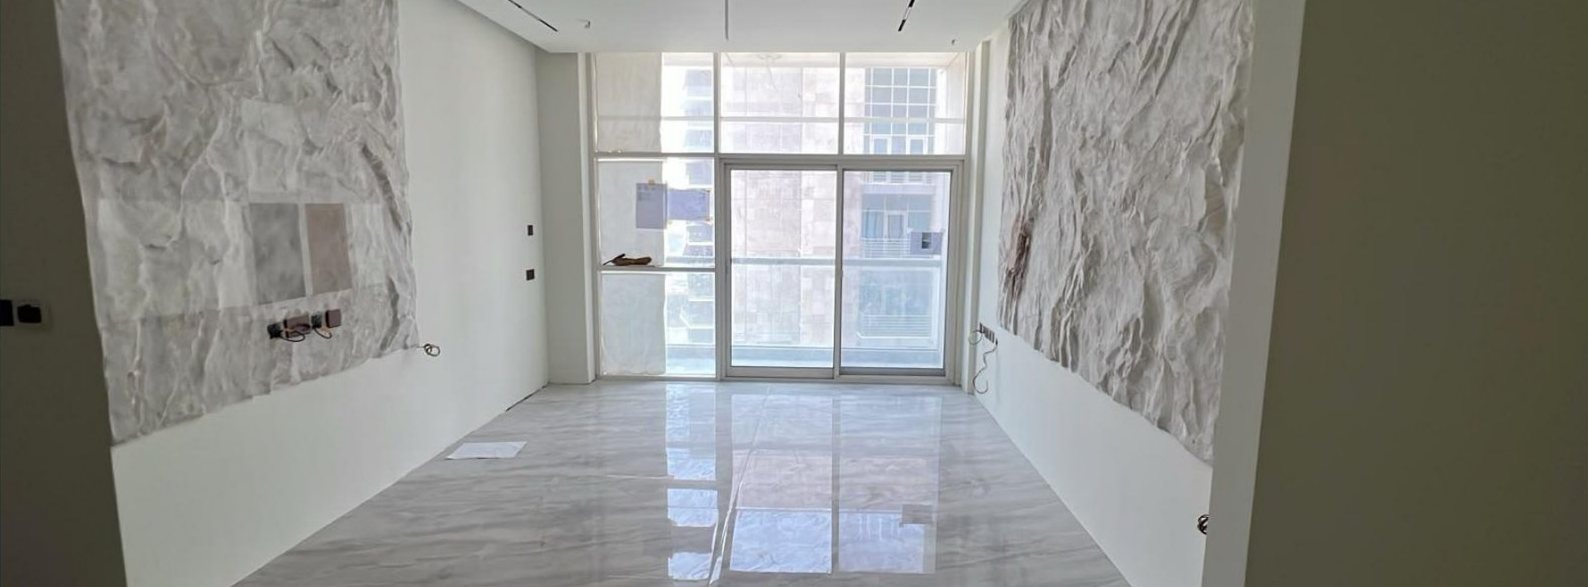
Stone wall and oak storage next to floor-to-ceiling windowsAfter
The finished stone wall and oak storage beside the full-height glazing.
Living room wall clad in rough-cut natural stone with a floating oak bench and lit oak nicheLiving area stripped back: the future stone wall on the left, corridor opening in the middle, kitchen on the rightStrip-outAfter
Drag to compareStrip-out ← → AfterSame view: stone wall on the left, corridor in the middle, kitchen on the right. The two photos were taken from slightly different spots.Full photos: Strip-out · After

More photos · Living room & stone wall

Living room before the works, looking towards the entrance with the old kitchen hatch on the leftBefore
Looking towards the entrance: the old kitchen was on the left, and every wall on that side came down.
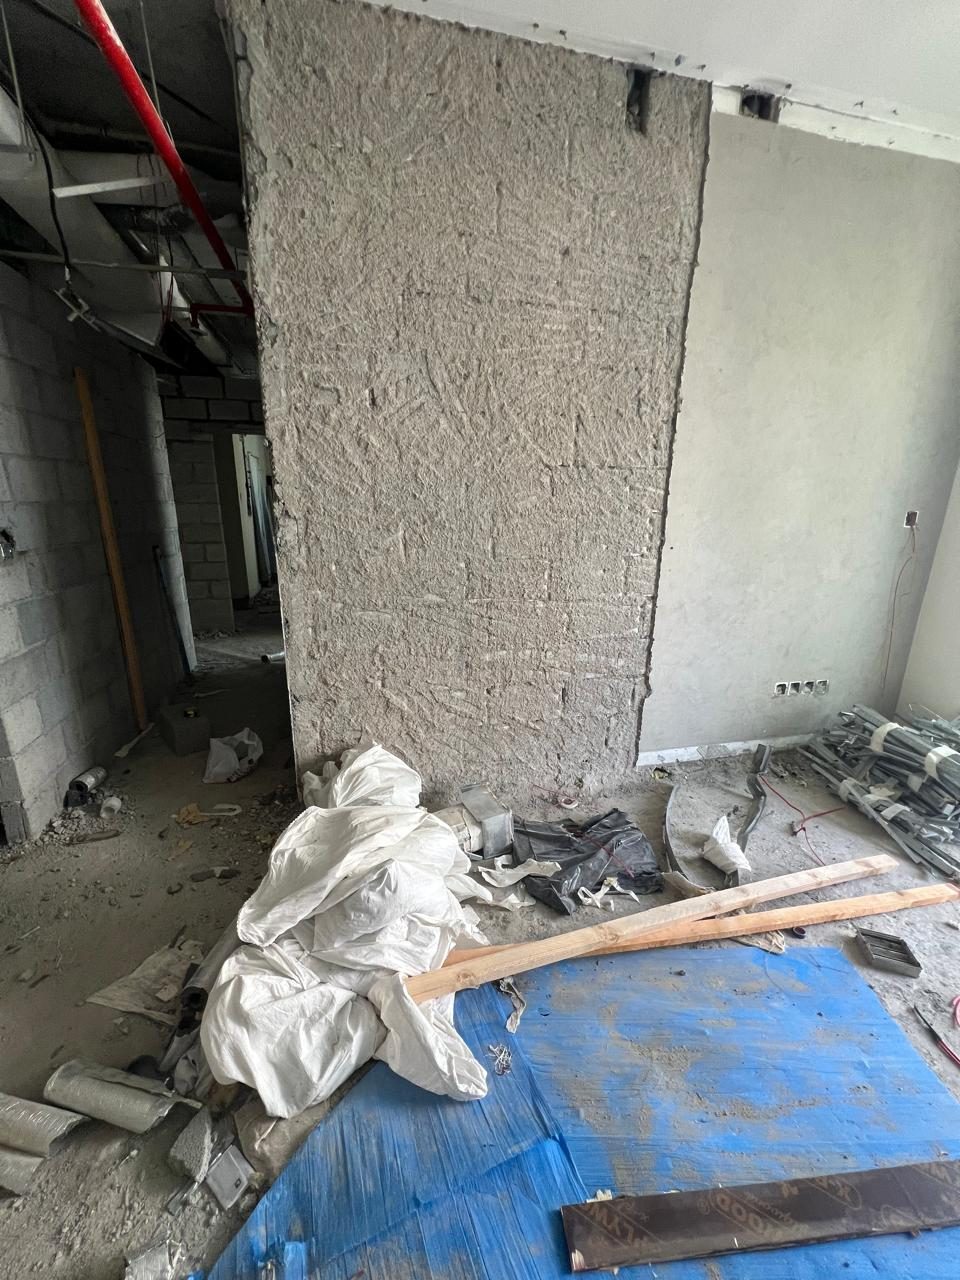
Team member stacking blocks in the living area during strip-out, wall opened on the right for the corridorStrip-out
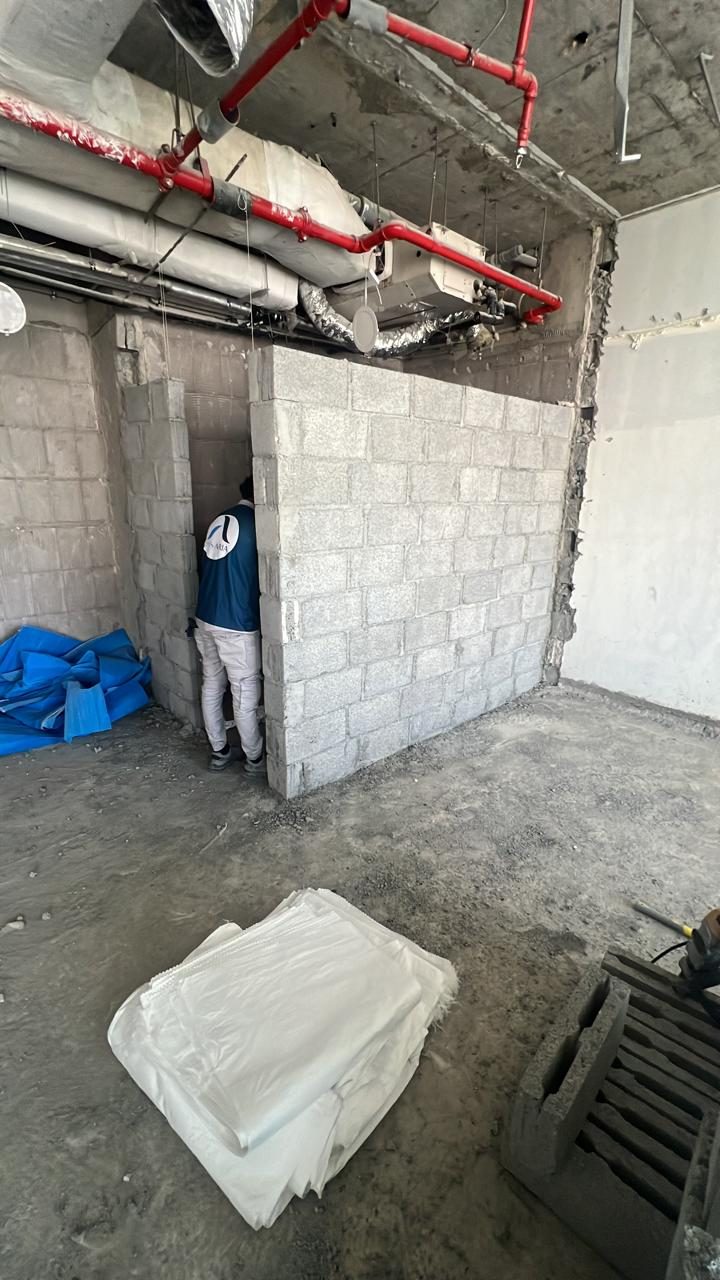
Stone wall on the left, corridor opening on the right; blocks stacked for the new walls.

TV wall

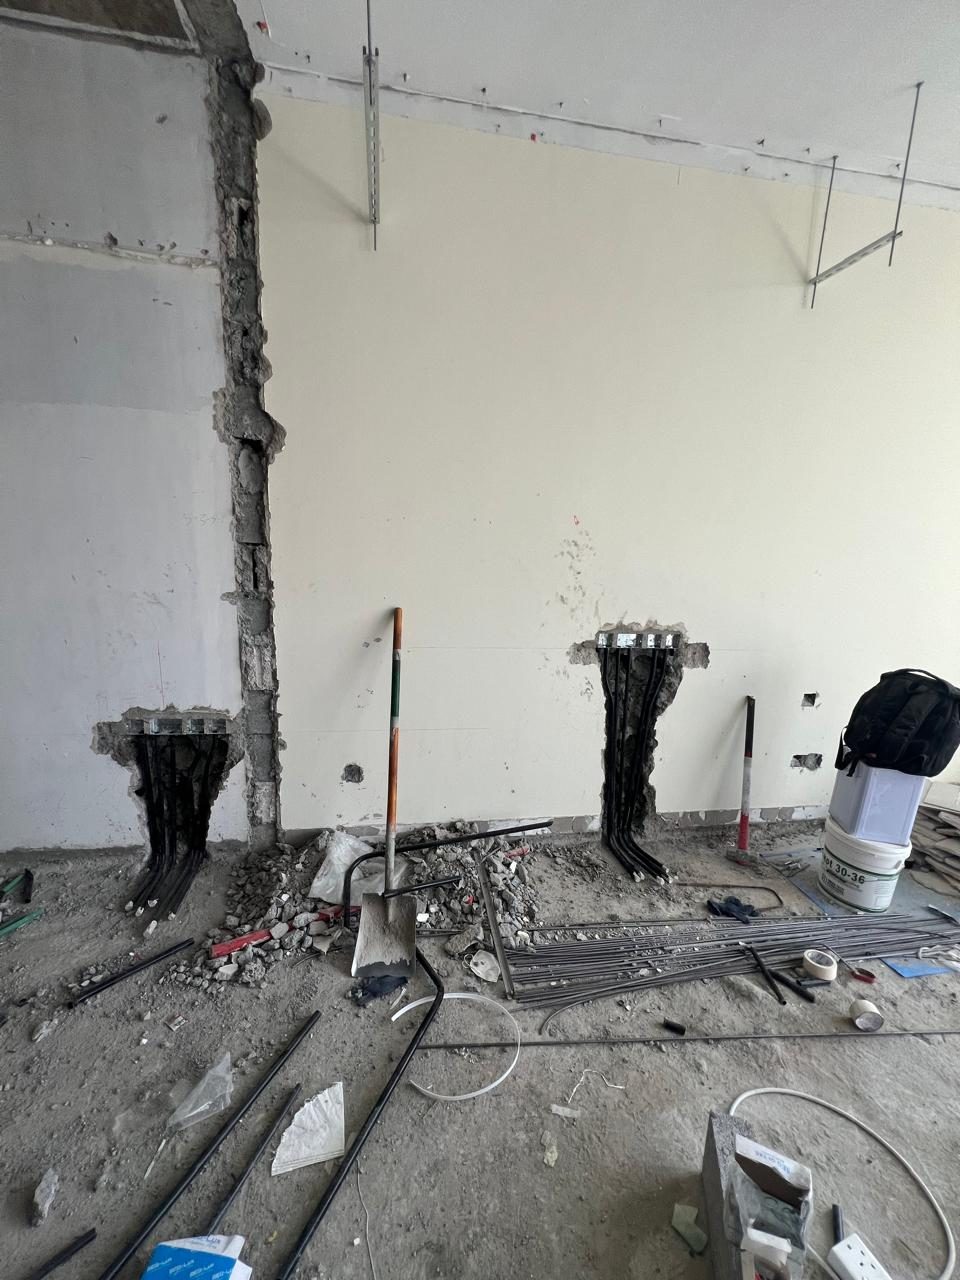
We removed these walls to make the TV area bigger, chased the wall for new cables and built a feature wall beside the full-height glazing.
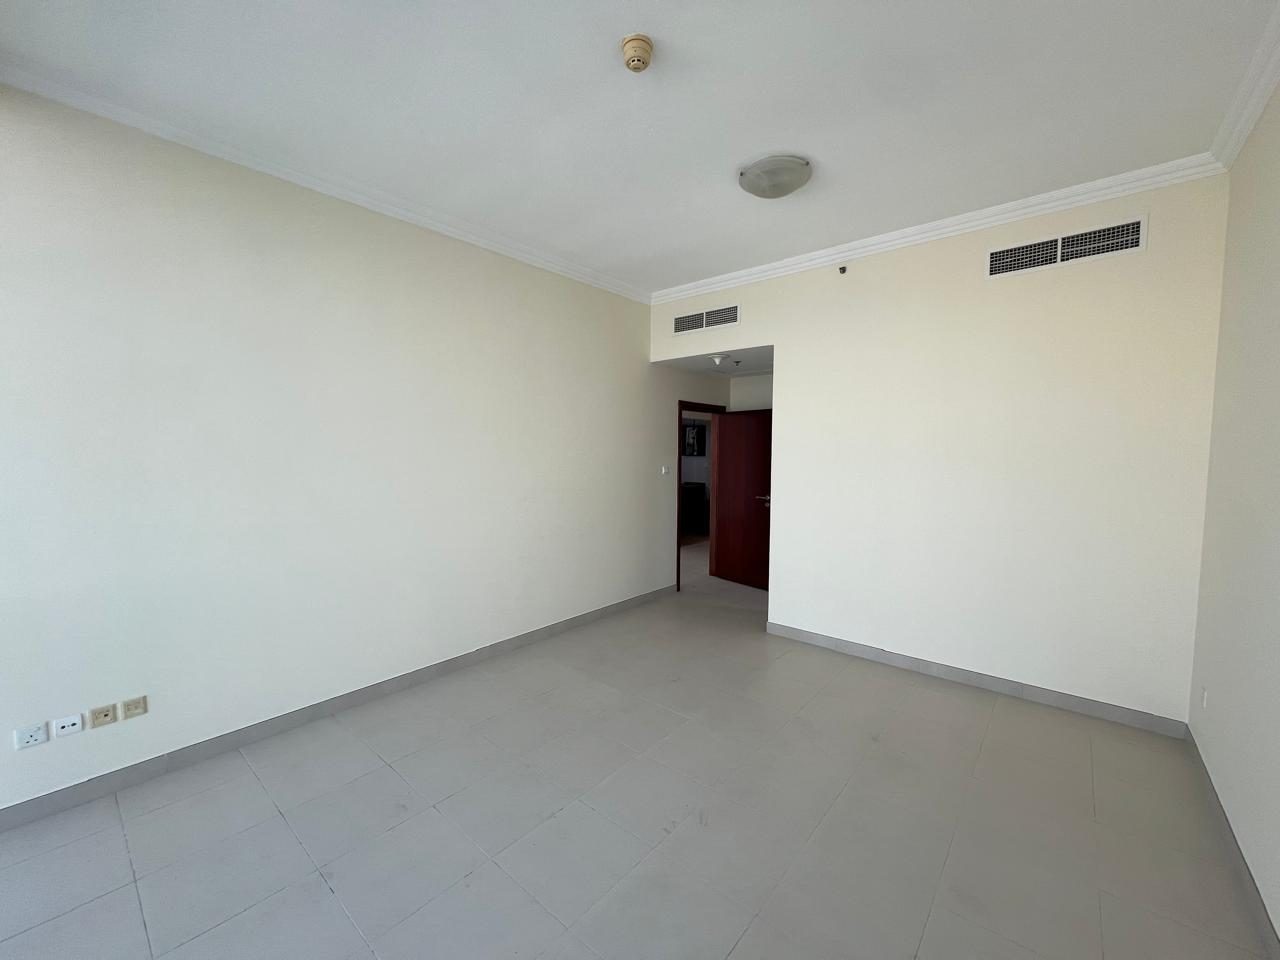
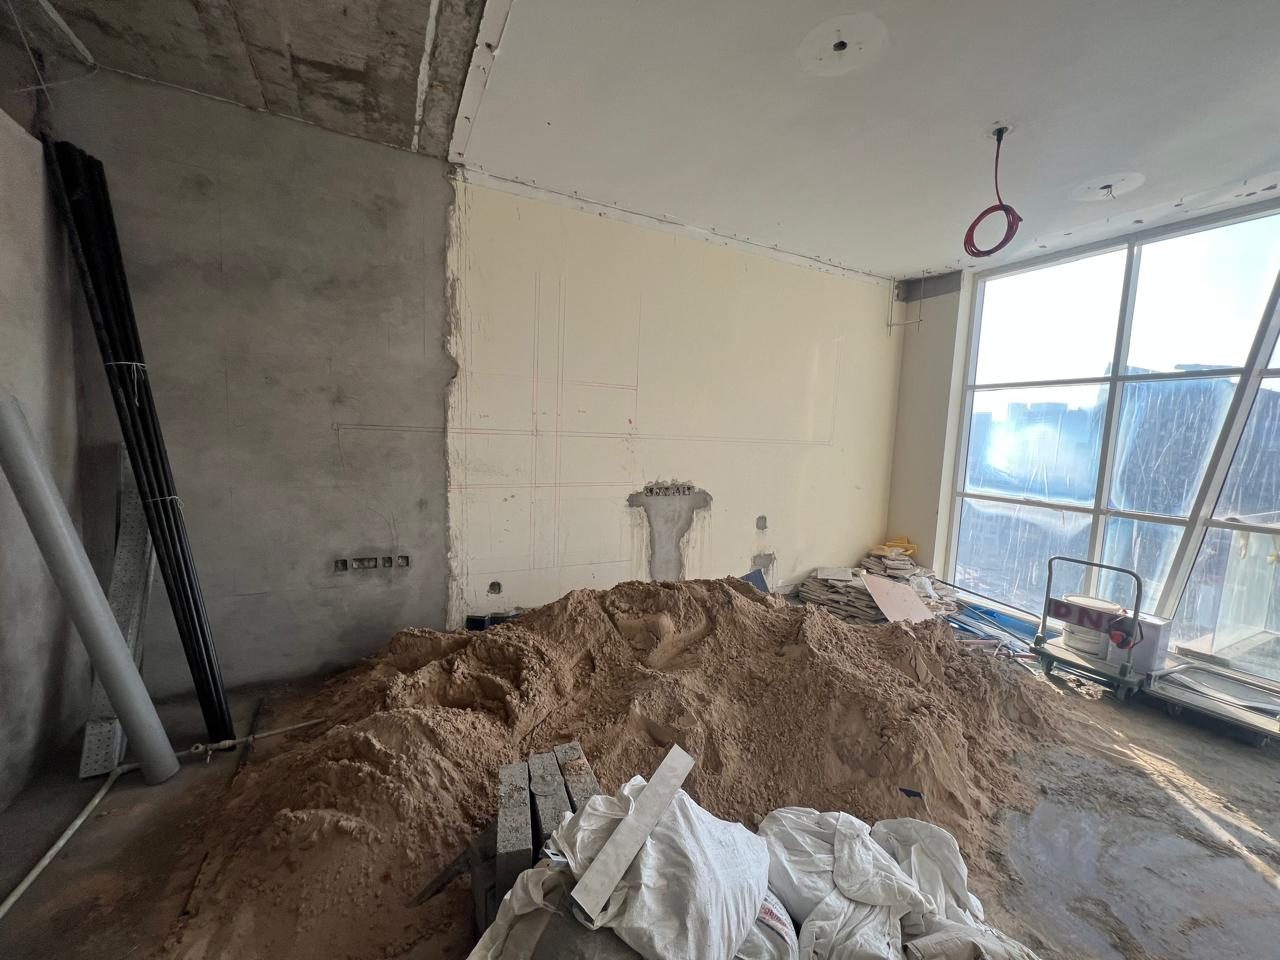
Empty room before the works, the walls later removed to enlarge the TV areaBefore
All of this came down to make the TV area bigger.
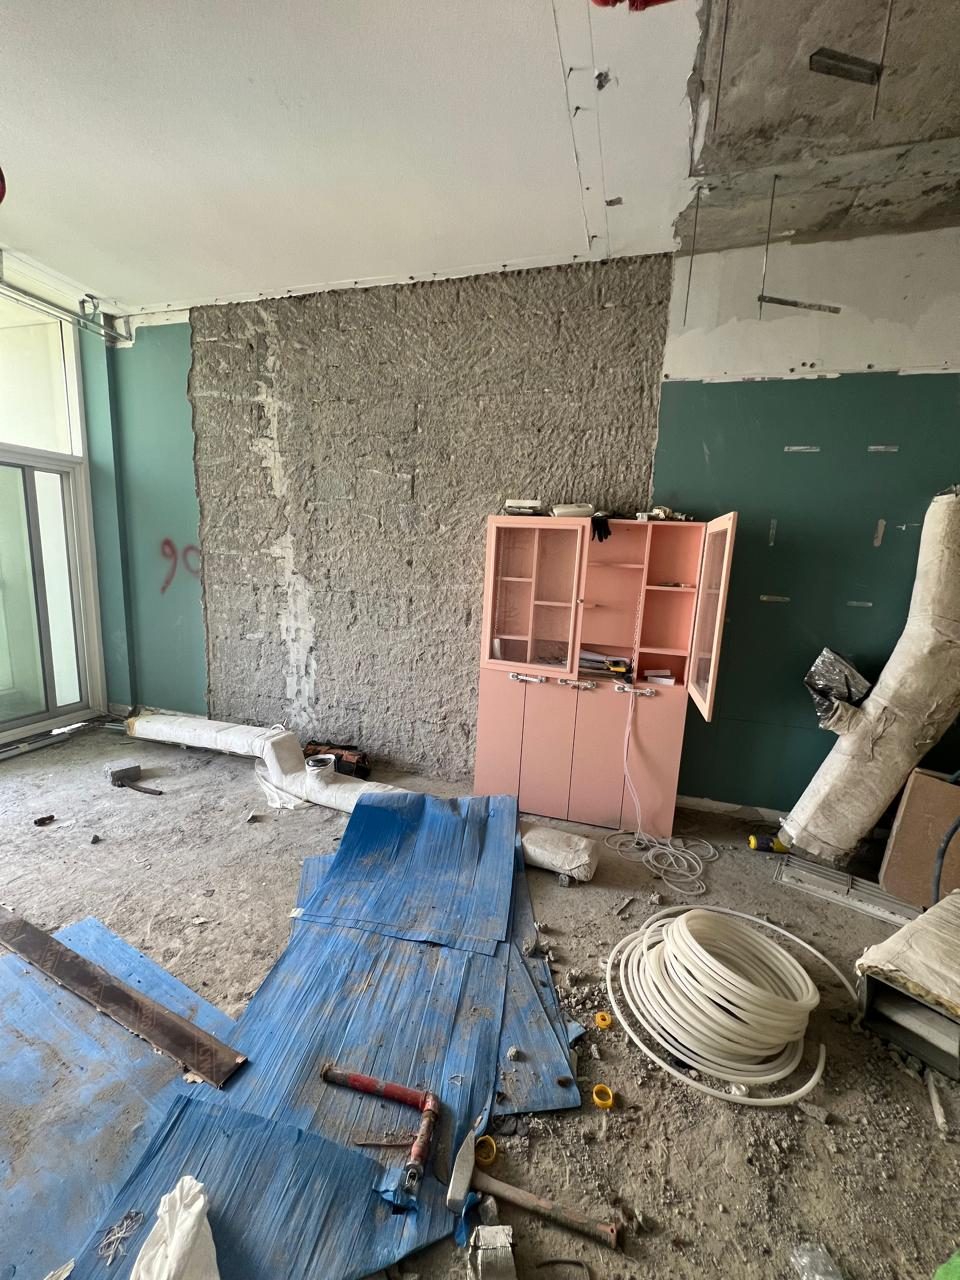
TV wall during the works, chased for new cabling at two outlet positionsIn progress
The TV wall, chased for new cables at two outlet points.
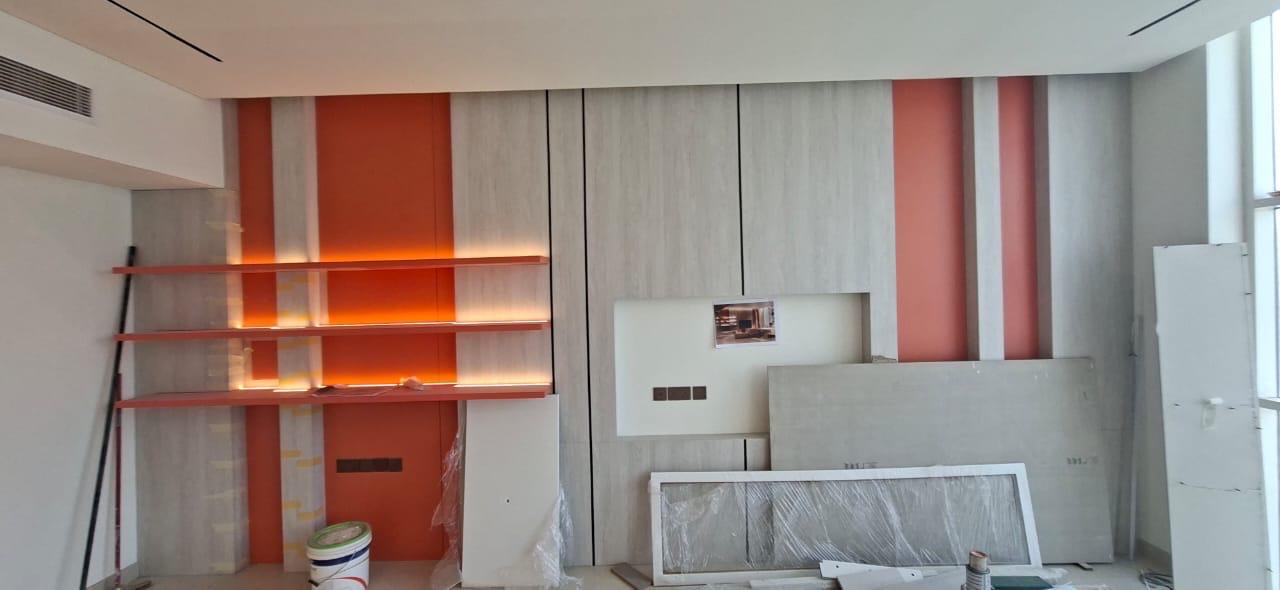
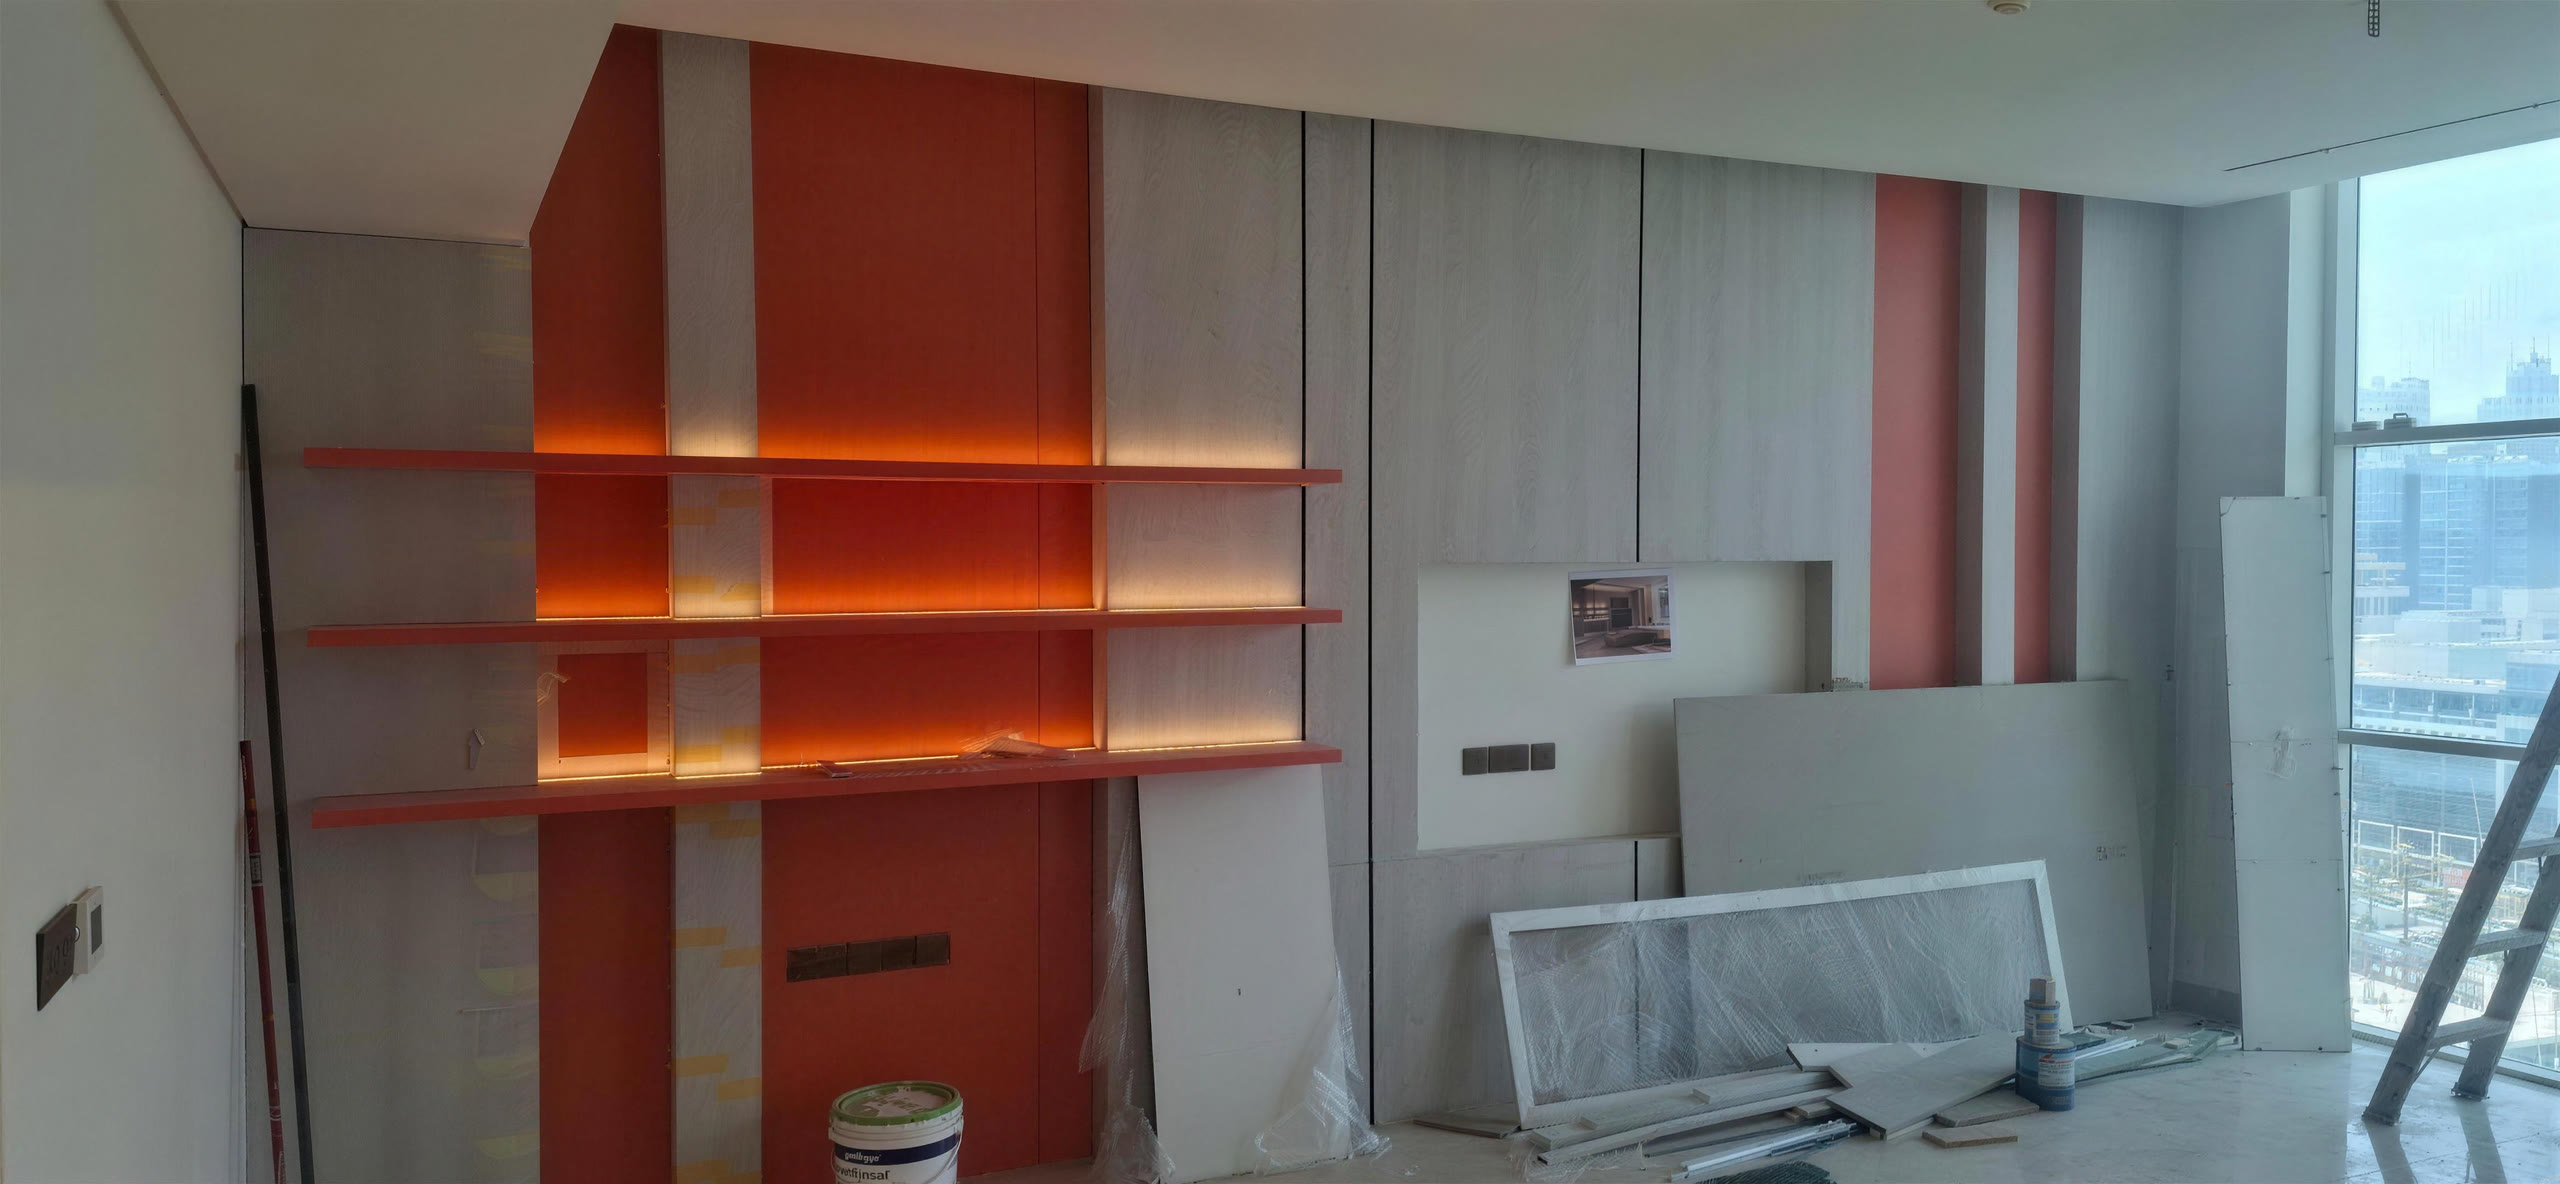
Feature wall of grey wood panels and terracotta lacquer with backlit shelves, during installationFinishing
Grey-washed panels, terracotta lacquer and backlit floating shelves going in.
TV feature wall during installation: terracotta lacquer and grey wood panels, backlit shelves and full-height glazing on the rightTV wall being set out in pencil beside full-height glazing, sand stockpiled for the worksIn progressFinishing
Drag to compareIn progress ← → FinishingSame wall, during the works and at the finishing stage, window on the right.Full photos: In progress · Finishing

Kitchen & entrance

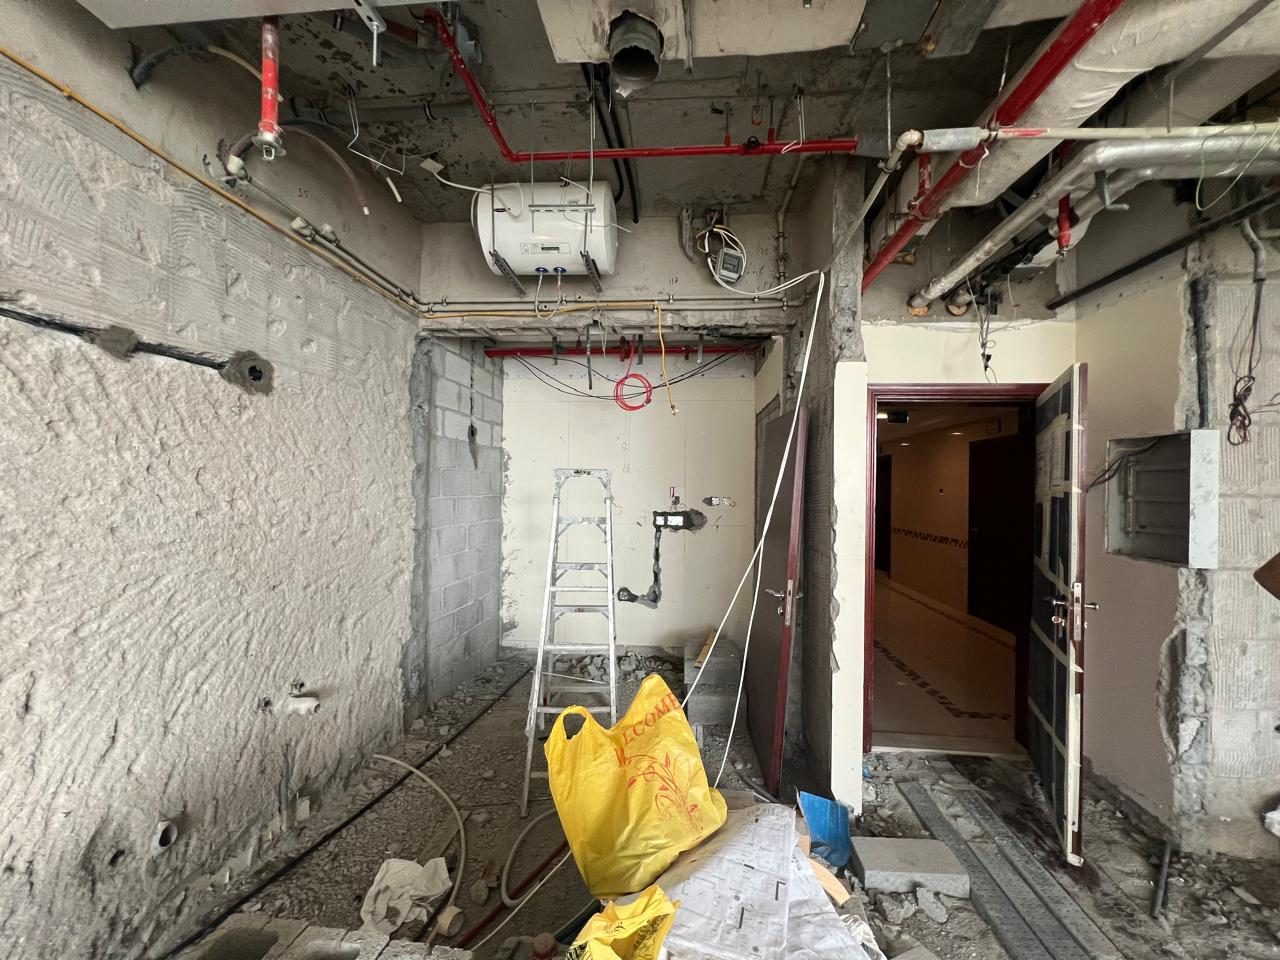
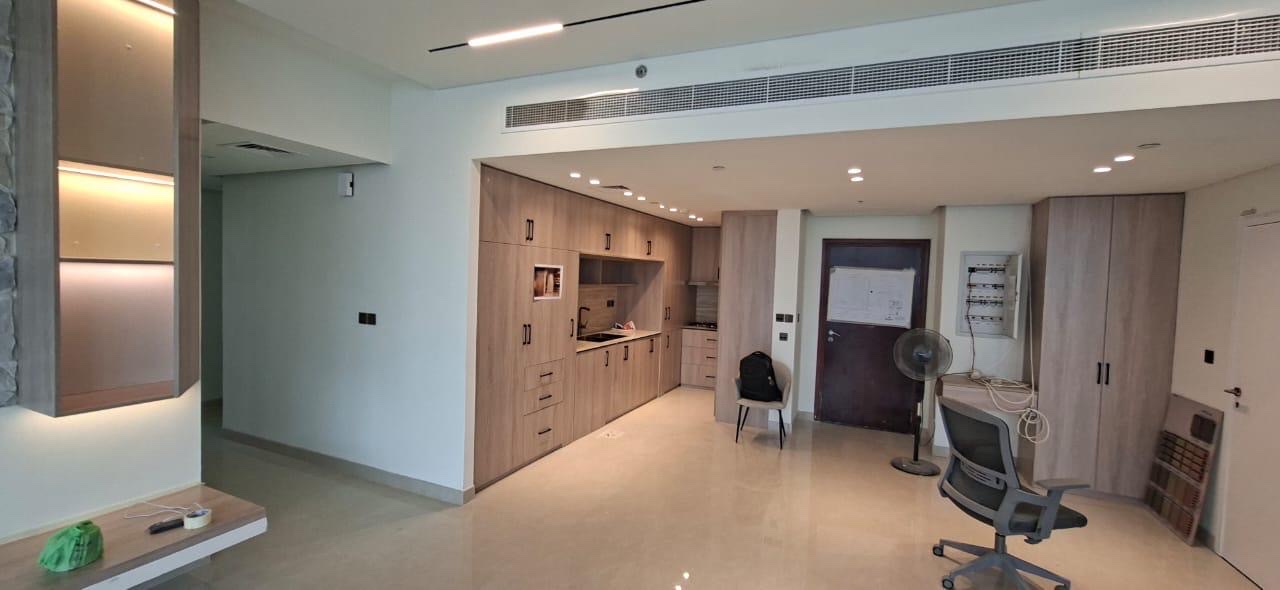
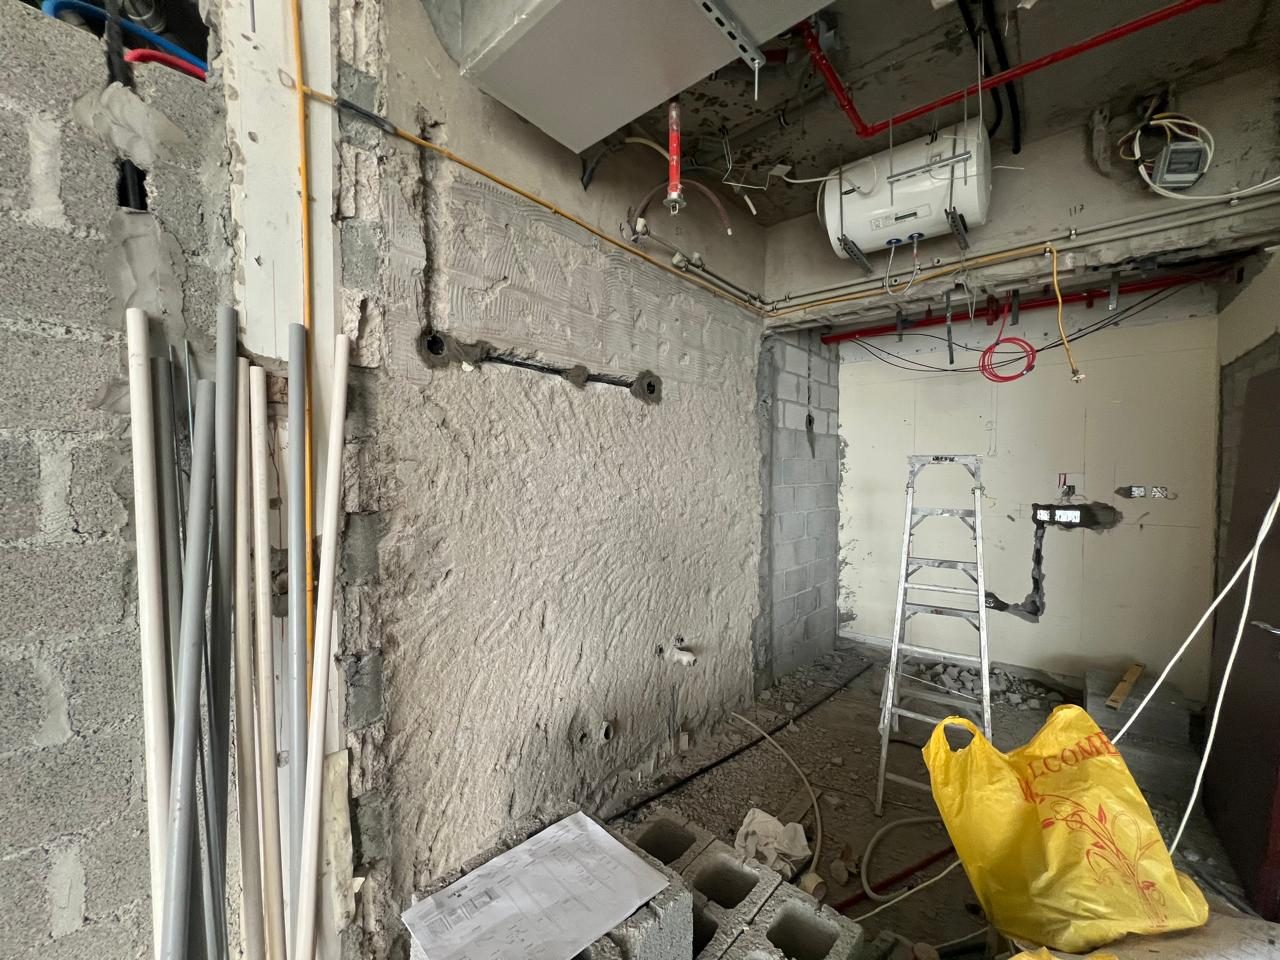
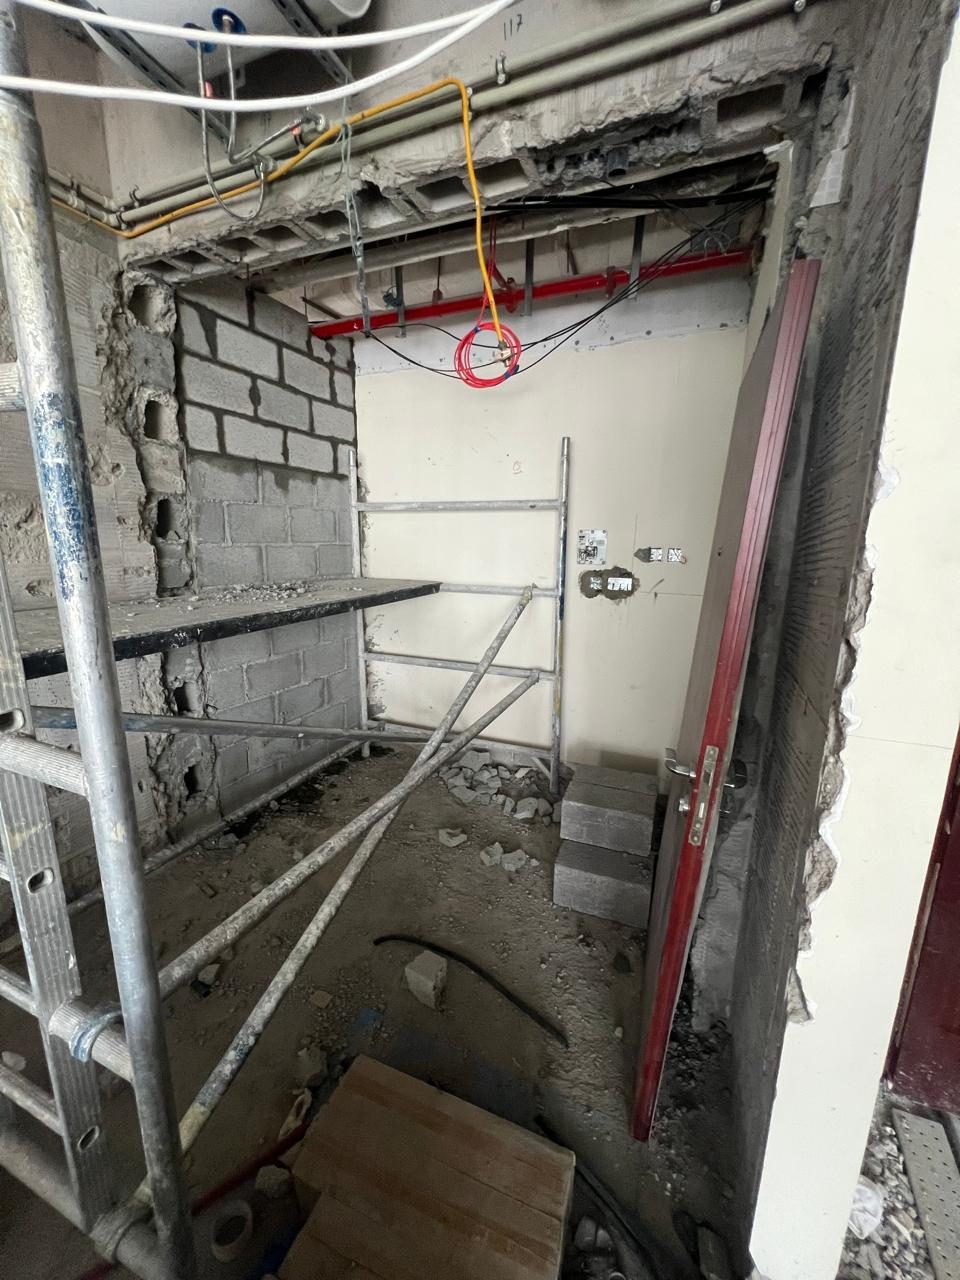
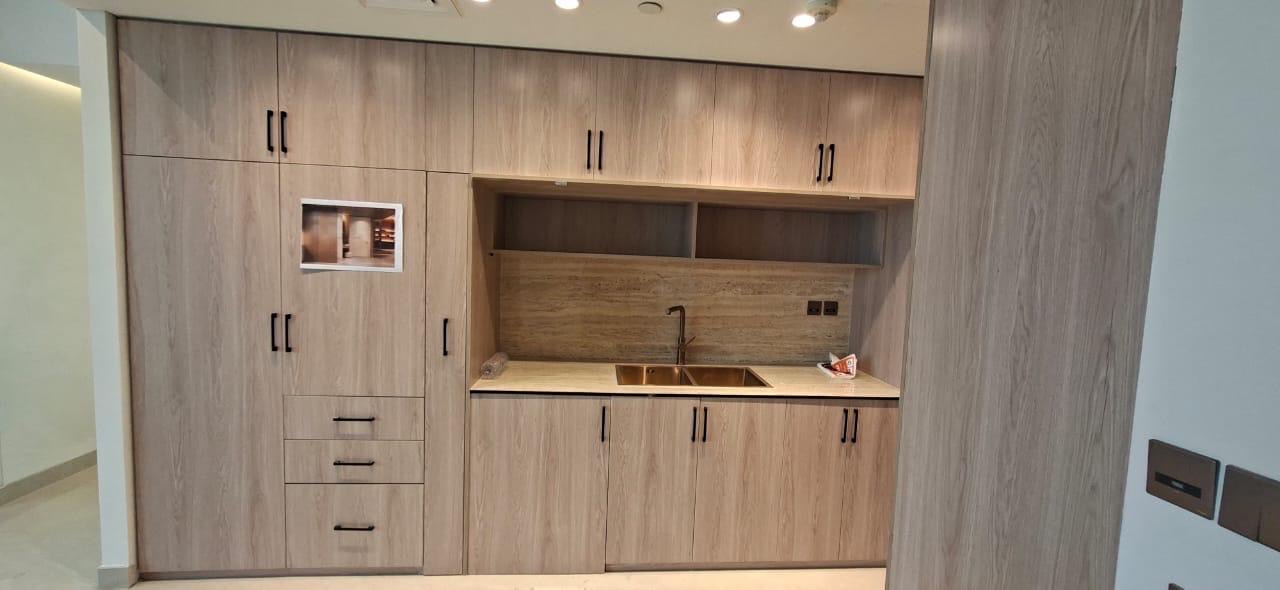
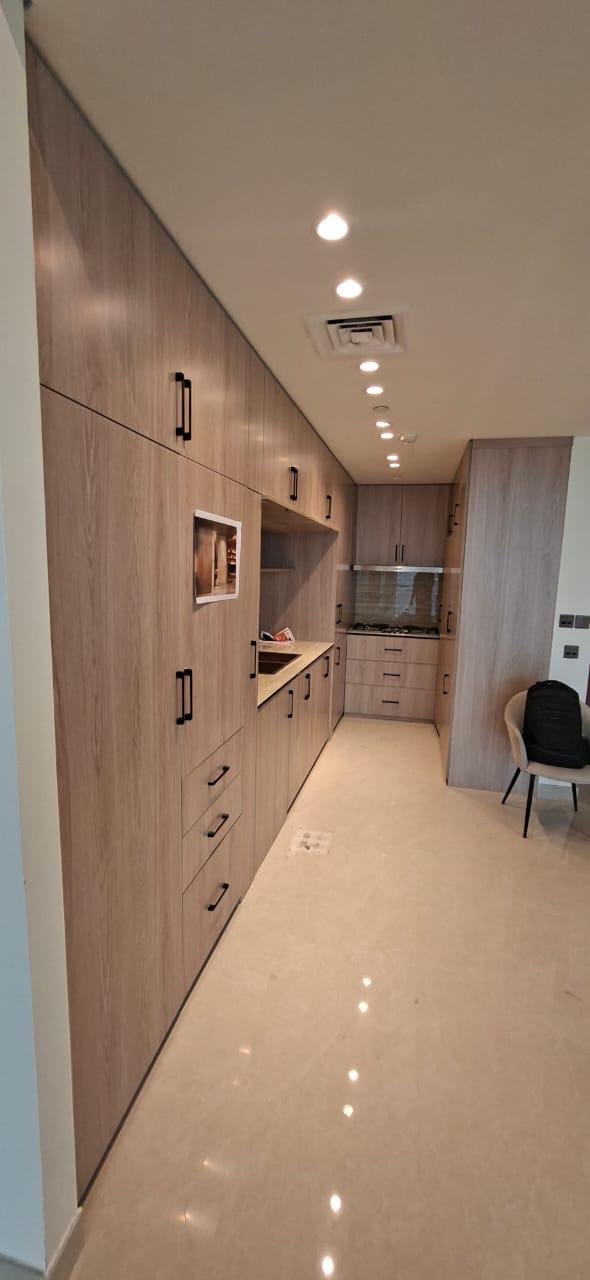
The old kitchen sat behind a serving hatch. We stripped the area back to the structure, rerouted the services and fitted a full-height oak kitchen next to the apartment entrance.
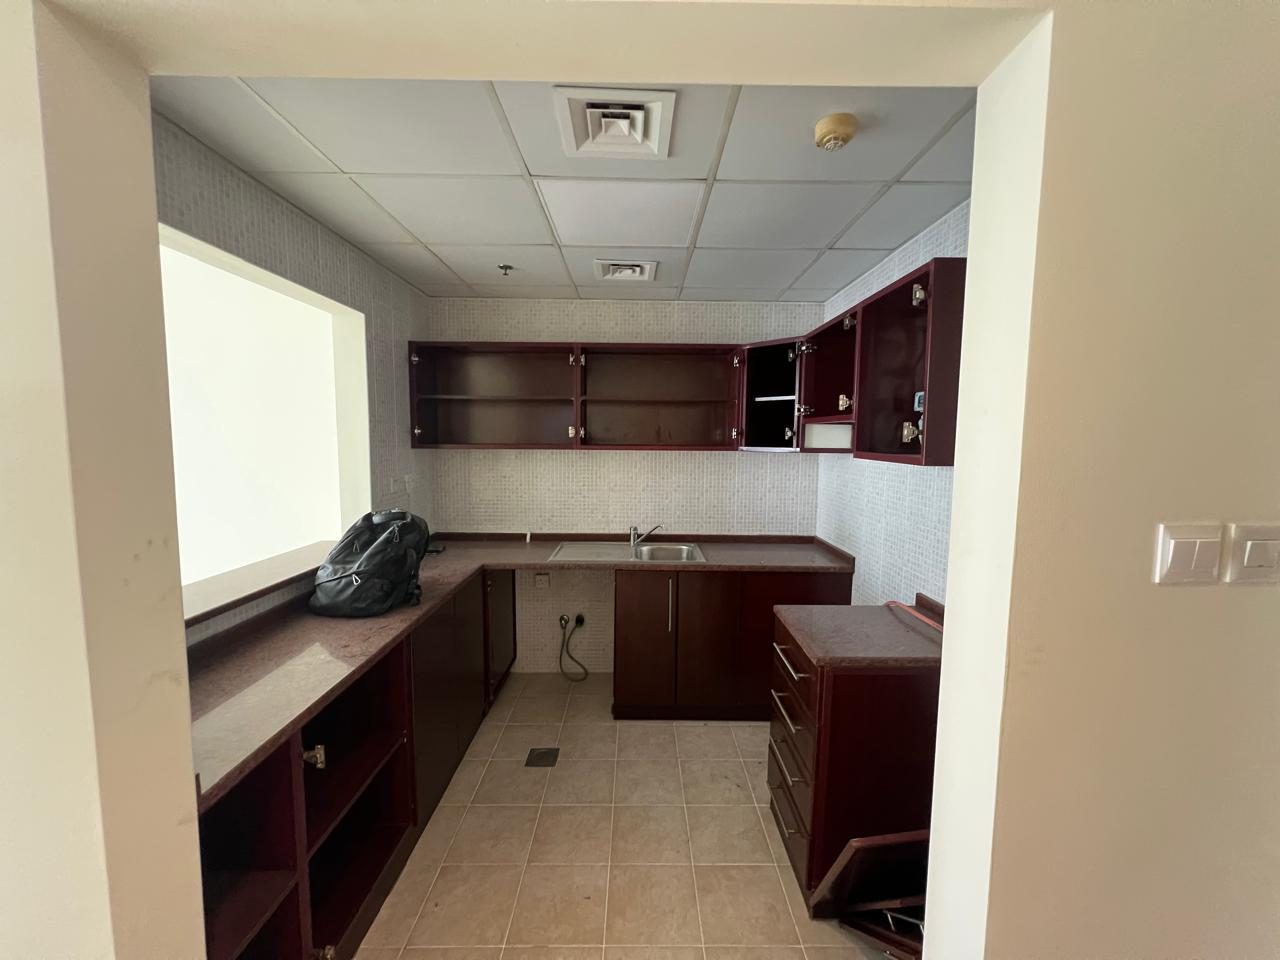
Old kitchen before the works, dark wood cabinets and mosaic tiles behind a serving hatchBefore
The original kitchen, behind its serving hatch.
Kitchen side stripped to the structure with services exposed, apartment entrance door open on the rightStrip-out
Back to the structure: the kitchen on the left, the apartment entrance on the right.
Open-plan living area and oak kitchen with linear ceiling lightsAfter
The oak kitchen beside the entrance door, open to the living room.

More photos · Kitchen & entrance

Kitchen wall rendered and services rerouted, with a water heater fixed overheadIn progress
The sink wall rendered, with the services rerouted.
Kitchen area during the works with new blockwork and scaffoldingIn progress
New blockwork in the kitchen area.
Oak kitchen with matching wood-grain splashback and a copper double sinkAfter
Oak-look splashback, copper sink and an open display shelf.
Long run of full-height light oak kitchen cabinetry with black handlesAfter
Floor-to-ceiling oak cabinetry with matte black pulls.

Master bedroom

This area became the master bedroom. After the strip-out, both side walls were rendered and finished in textured cladding, facing the full-height glazing.
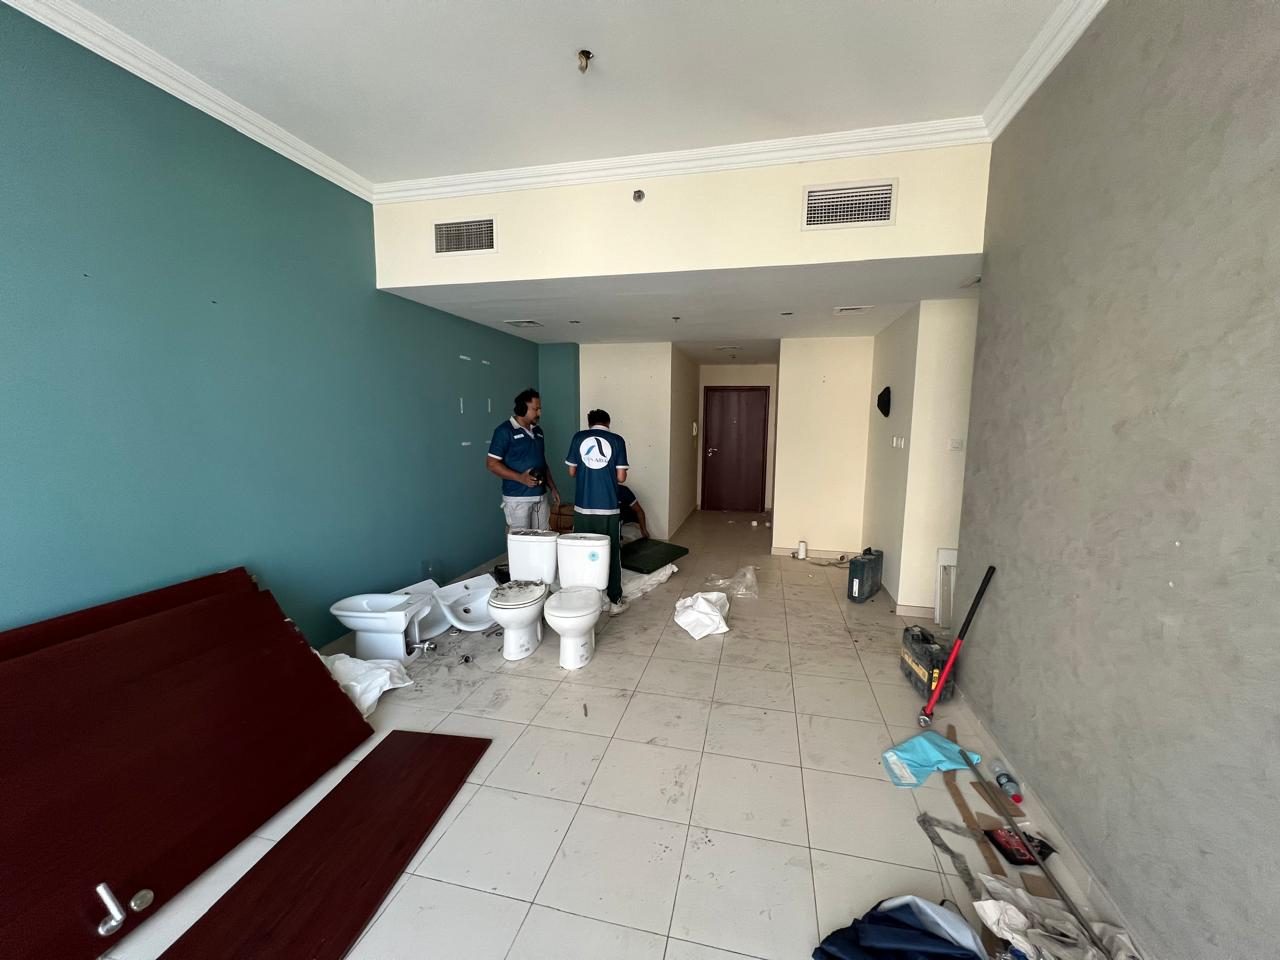
Room that became the master bedroom, with the team removing old sanitaryware at the start of the worksBefore
This area became the new master bedroom. The old sanitaryware is coming out.
Master bedroom stripped back, walls rendered for cladding and glazing facing the neighbouring towerStrip-out
Stripped back, with the side wall rendered for cladding.
Master bedroom near handover: white textured cladding on both side walls, polished marble-look floor and full-height glazingAfter
Textured cladding on both side walls, a polished floor and full-height glazing.

More photos · Master bedroom

Master bedroom during strip-out, rendered wall between the original painted wallsStrip-out
The rendered wall between the original painted walls.
Master bedroom during strip-out looking towards the new bedrooms corridorStrip-out
Looking towards the new bedrooms corridor.

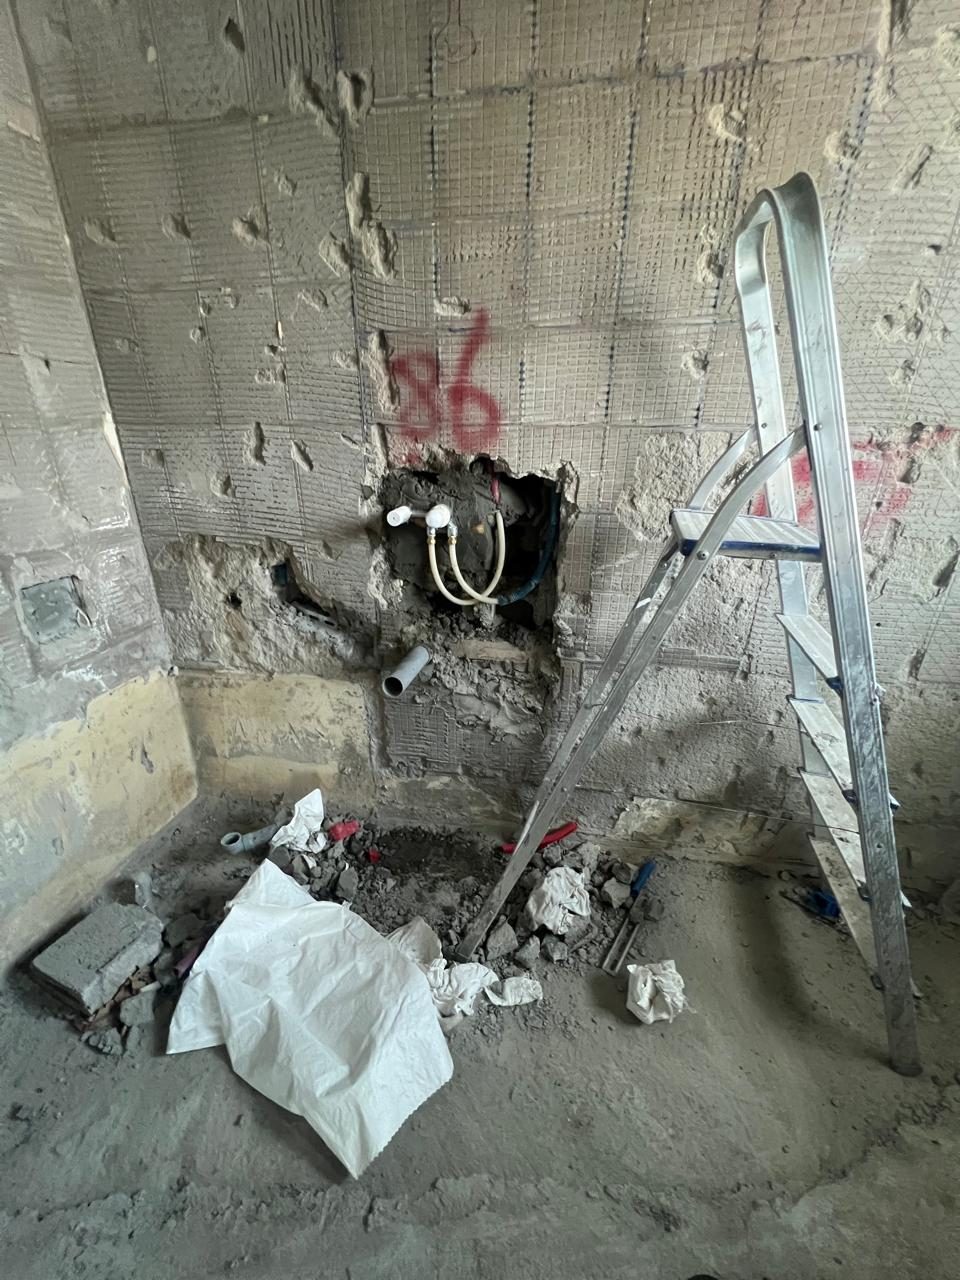
Master bathroom

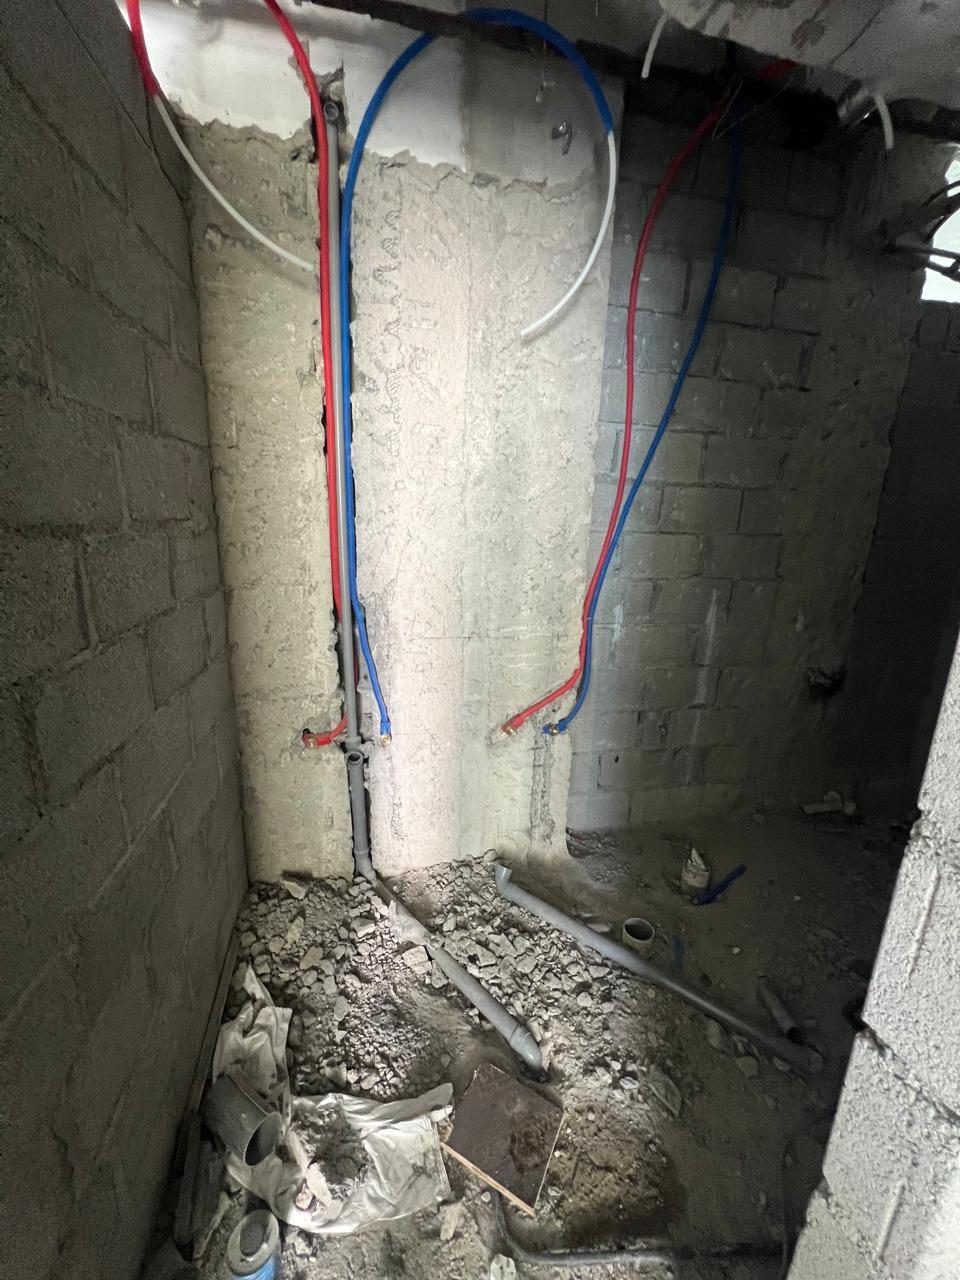
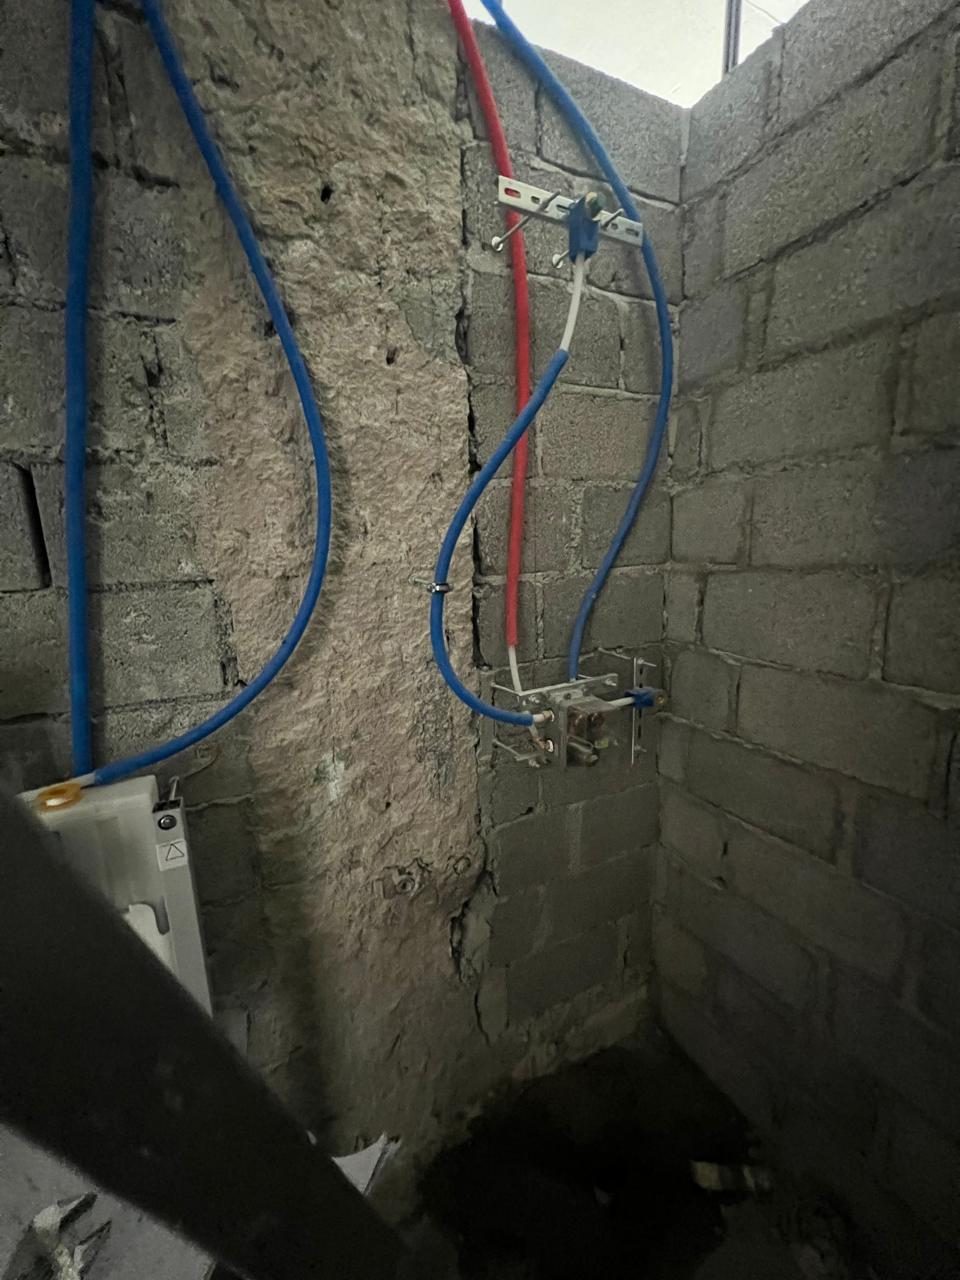
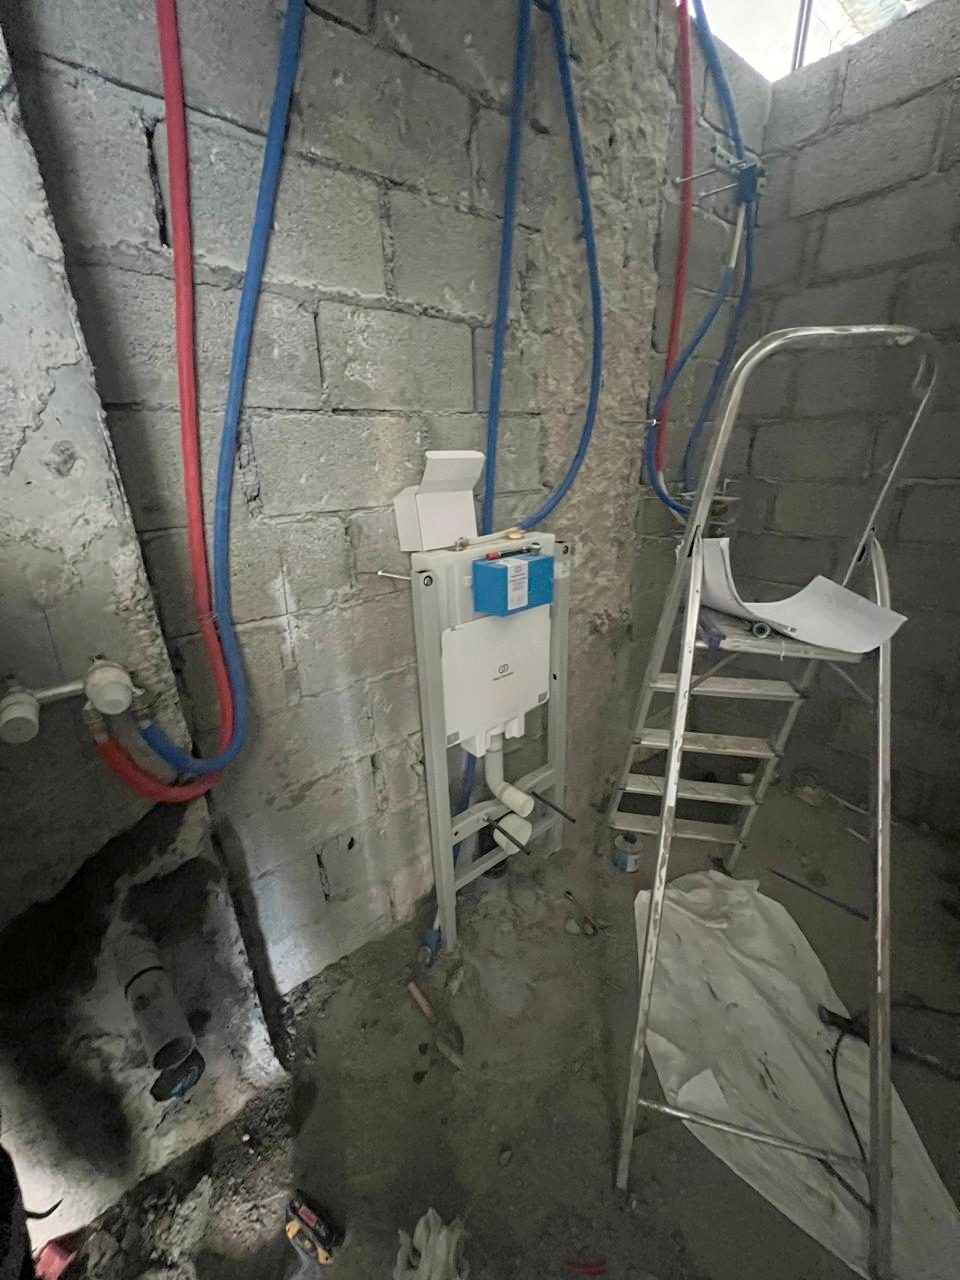
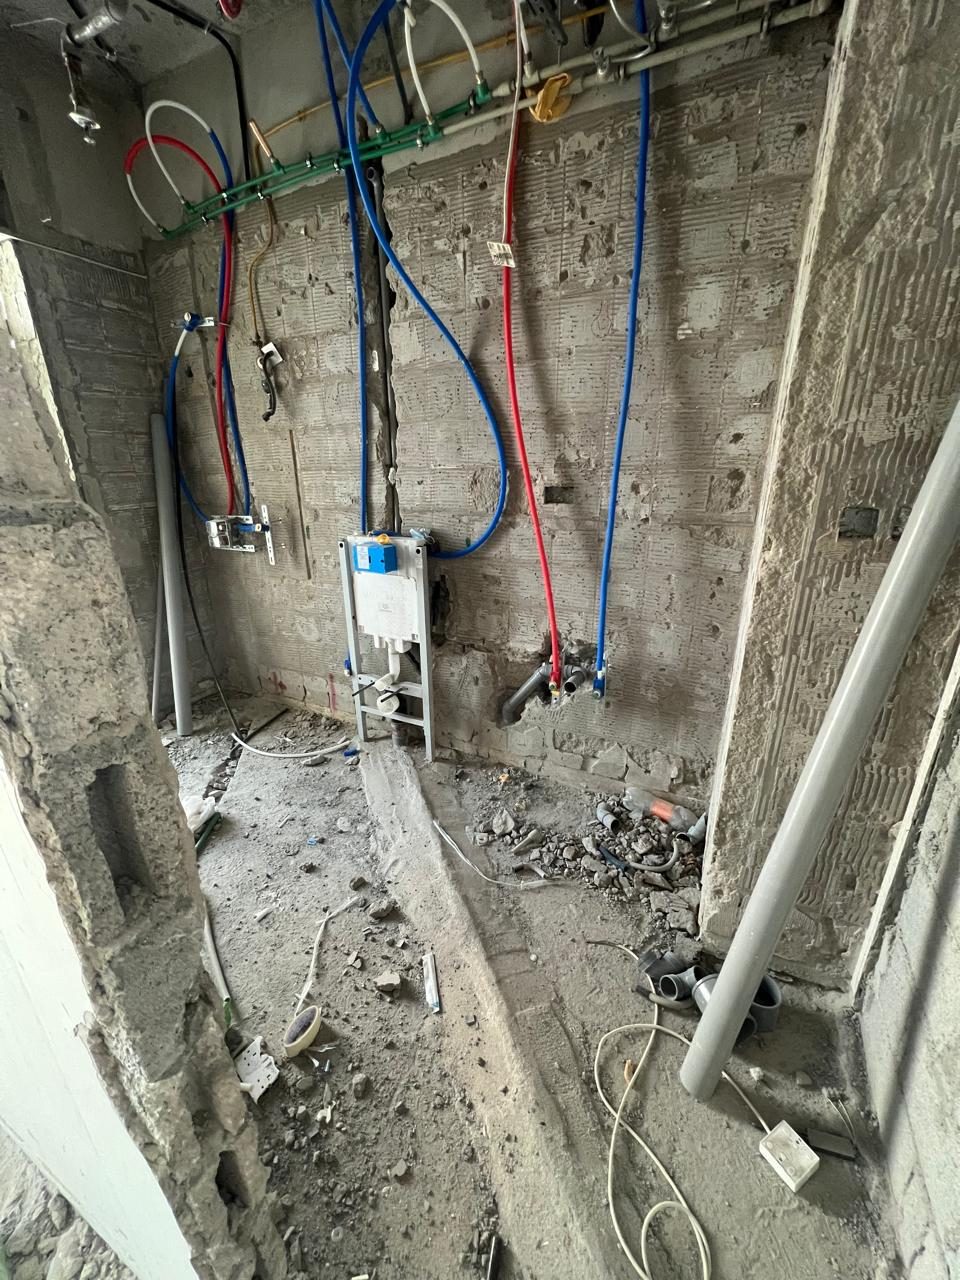
We removed the walls on the left and right to make the master bathroom bigger, then ran new hot and cold supply lines and fixed a concealed WC cistern.
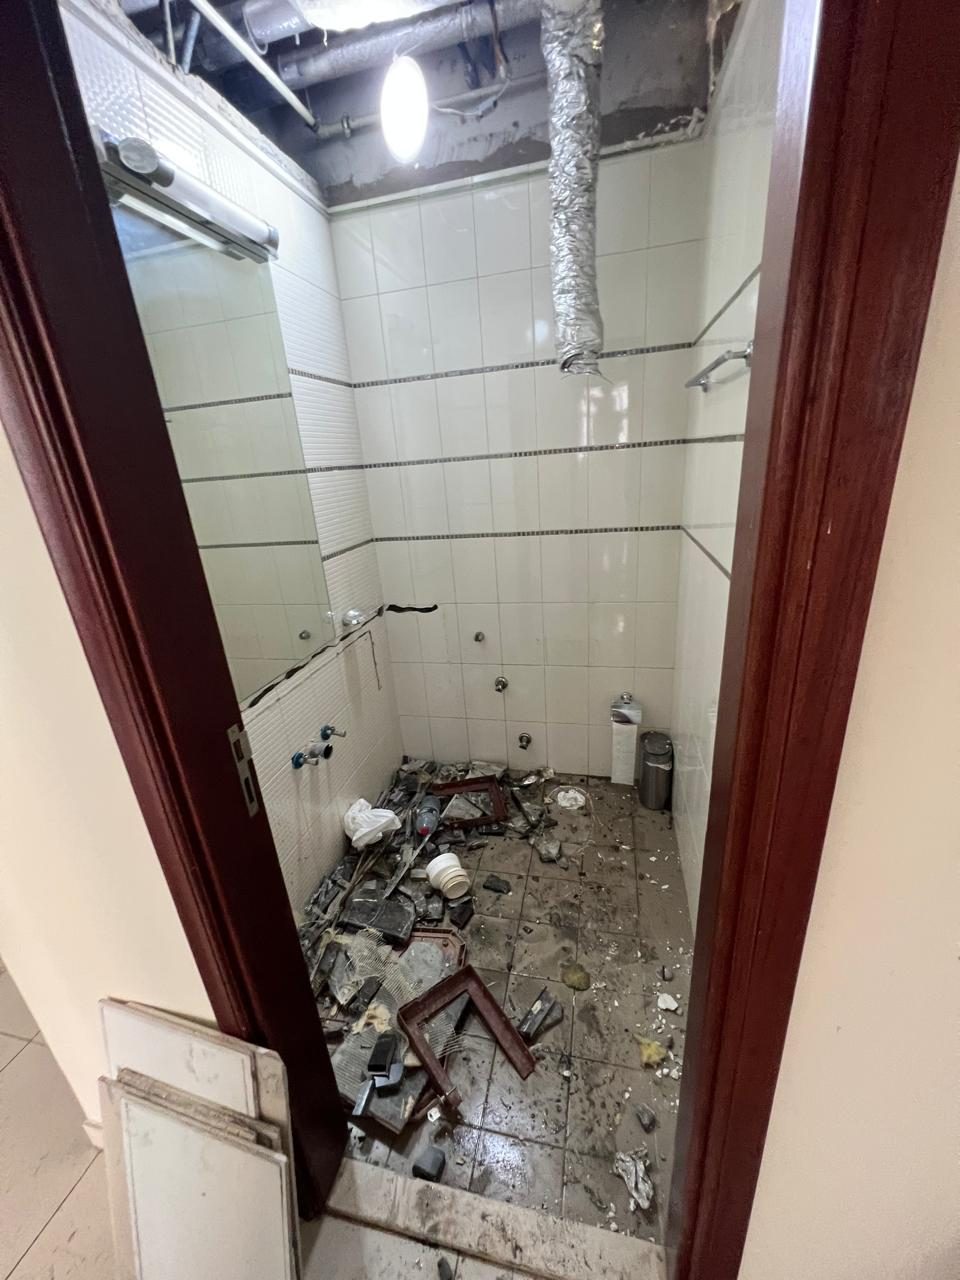
Old bathroom being stripped out before the walls were removed for a bigger master bathroomBefore
The walls on the left and right came out to make a bigger master bathroom.
Master bathroom shower wall with new hot and cold supply lines and waste pipesIn progress
New hot and cold supply lines and waste pipes on the shower wall.
Master bathroom during the works: blue and red supply pipes running down a blockwork wall to a valveIn progress
Hot and cold supply lines run down the blockwork to the valve.
Concealed WC cistern frame fixed to new blockwork in the master bathroomIn progress
A concealed WC cistern frame fixed to the new blockwork.

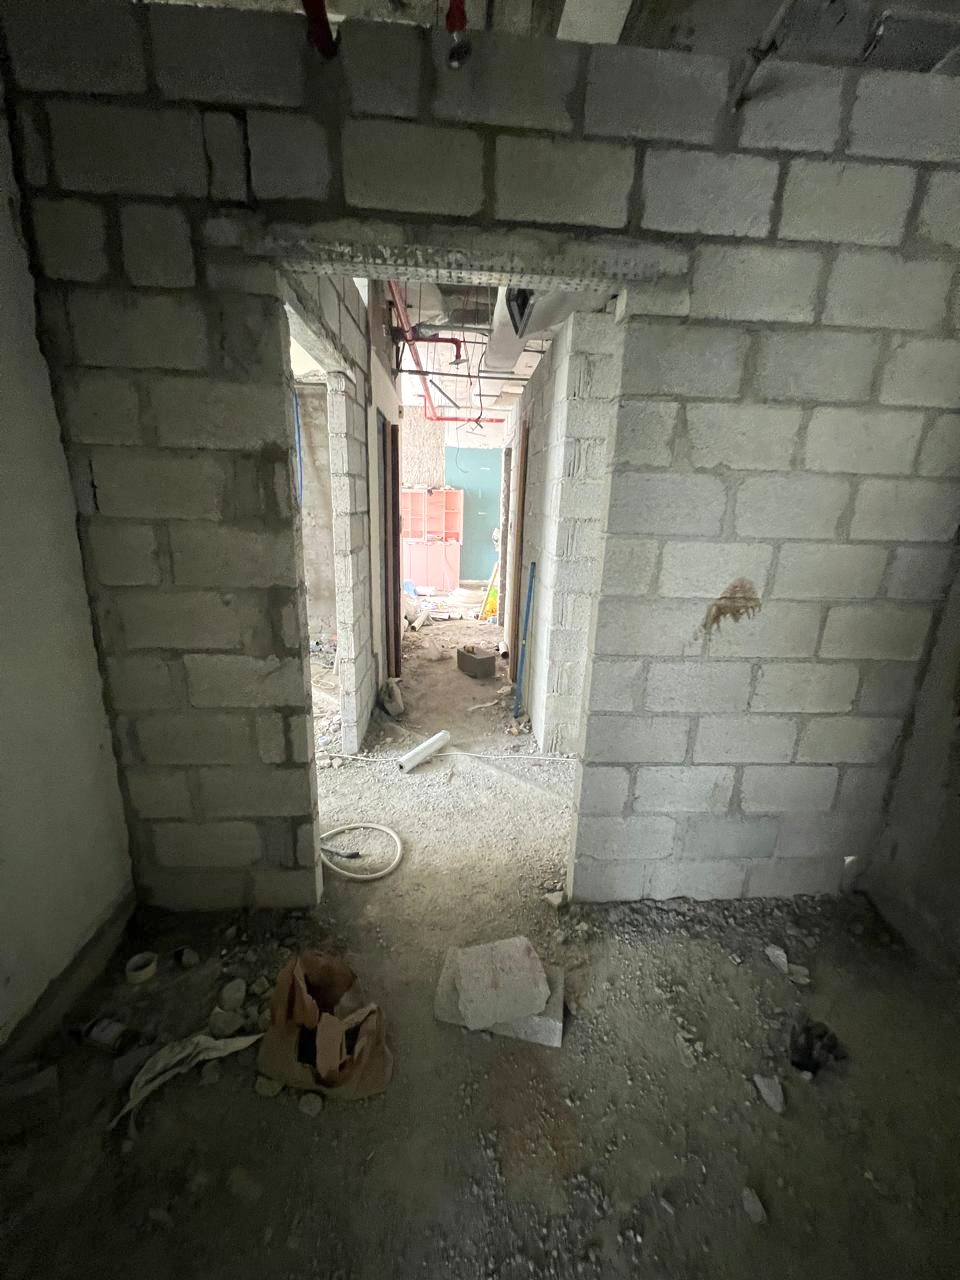
Bedrooms corridor

A new corridor leads to the bedrooms, built in new blockwork with the door frames fixed.
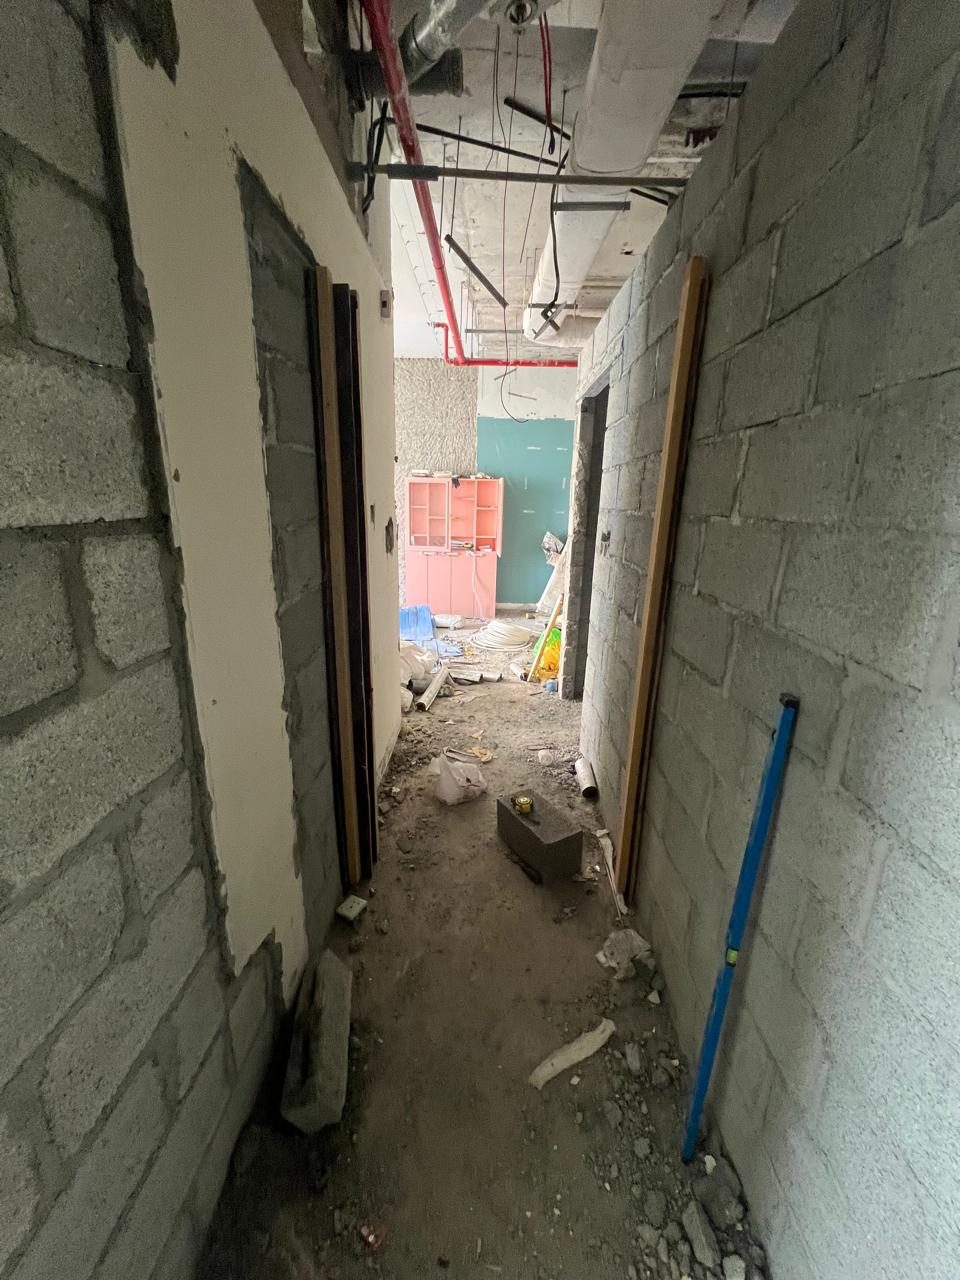
Bedrooms corridor in new blockwork with door frames fixedIn progress
The bedrooms corridor in new blockwork, door frames fixed.

Bedroom 2

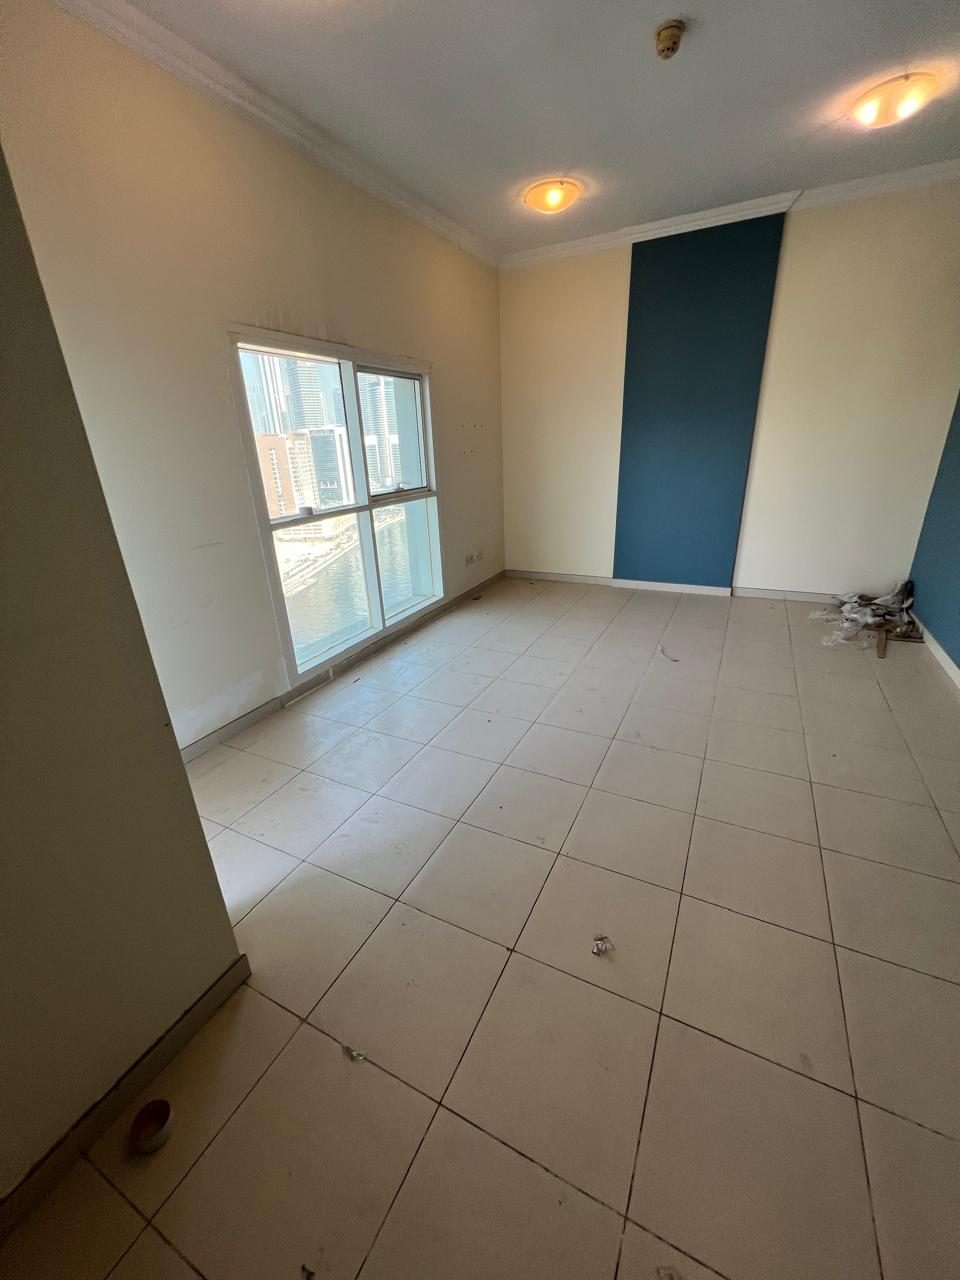
Bedroom 2 before the works, and the new door opening we formed for it.
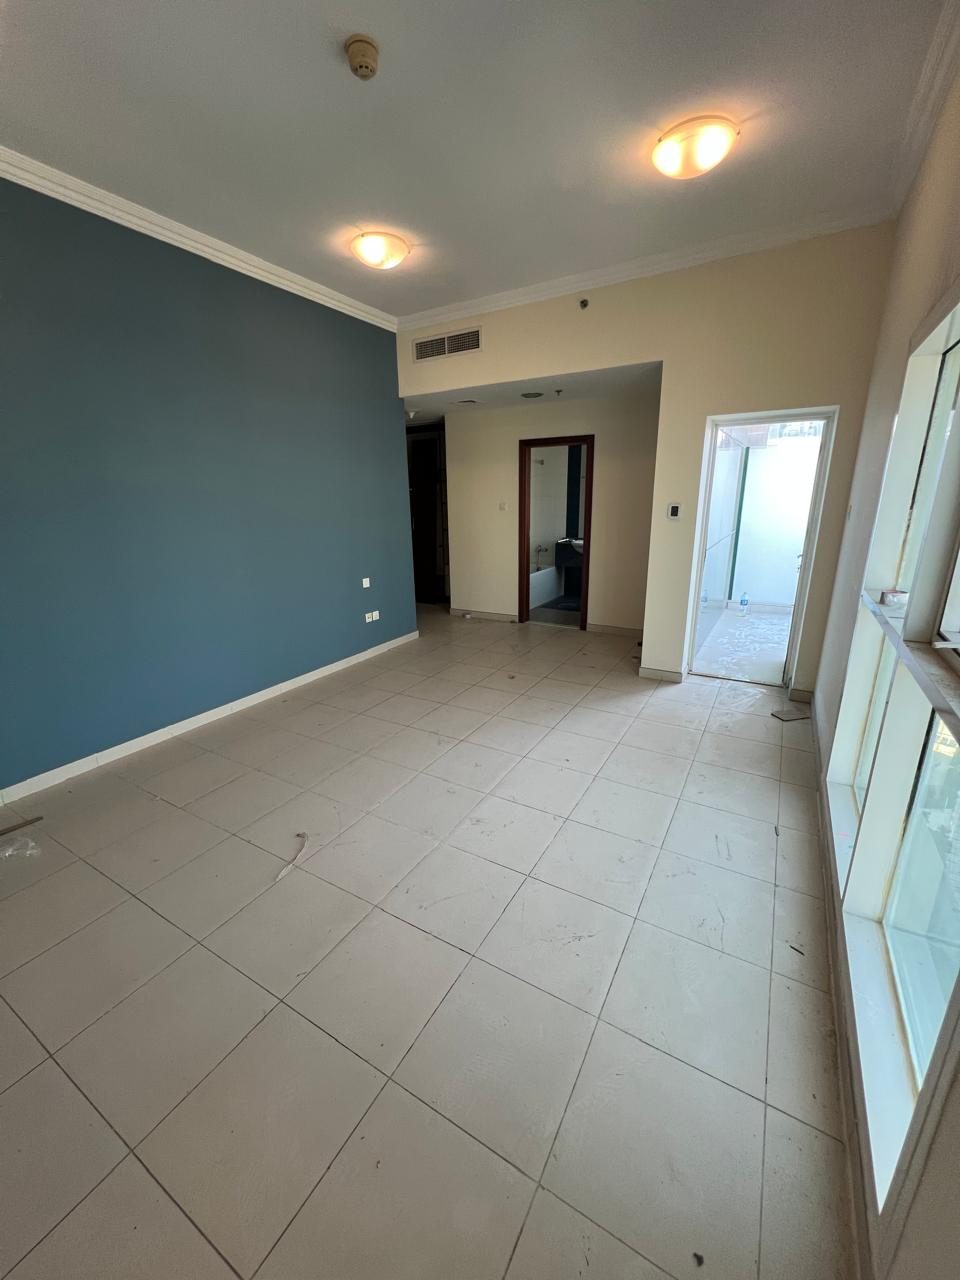
Bedroom 2 before the works, blue feature wall and two doors off the roomBefore
Bedroom 2 before: blue feature wall, with two doors off the room.
Bedroom 2 before the works, window with a view over the waterBefore
Bedroom 2 before, on the window side.
New door opening for bedroom 2 formed in blockworkIn progress
The new door opening for bedroom 2.

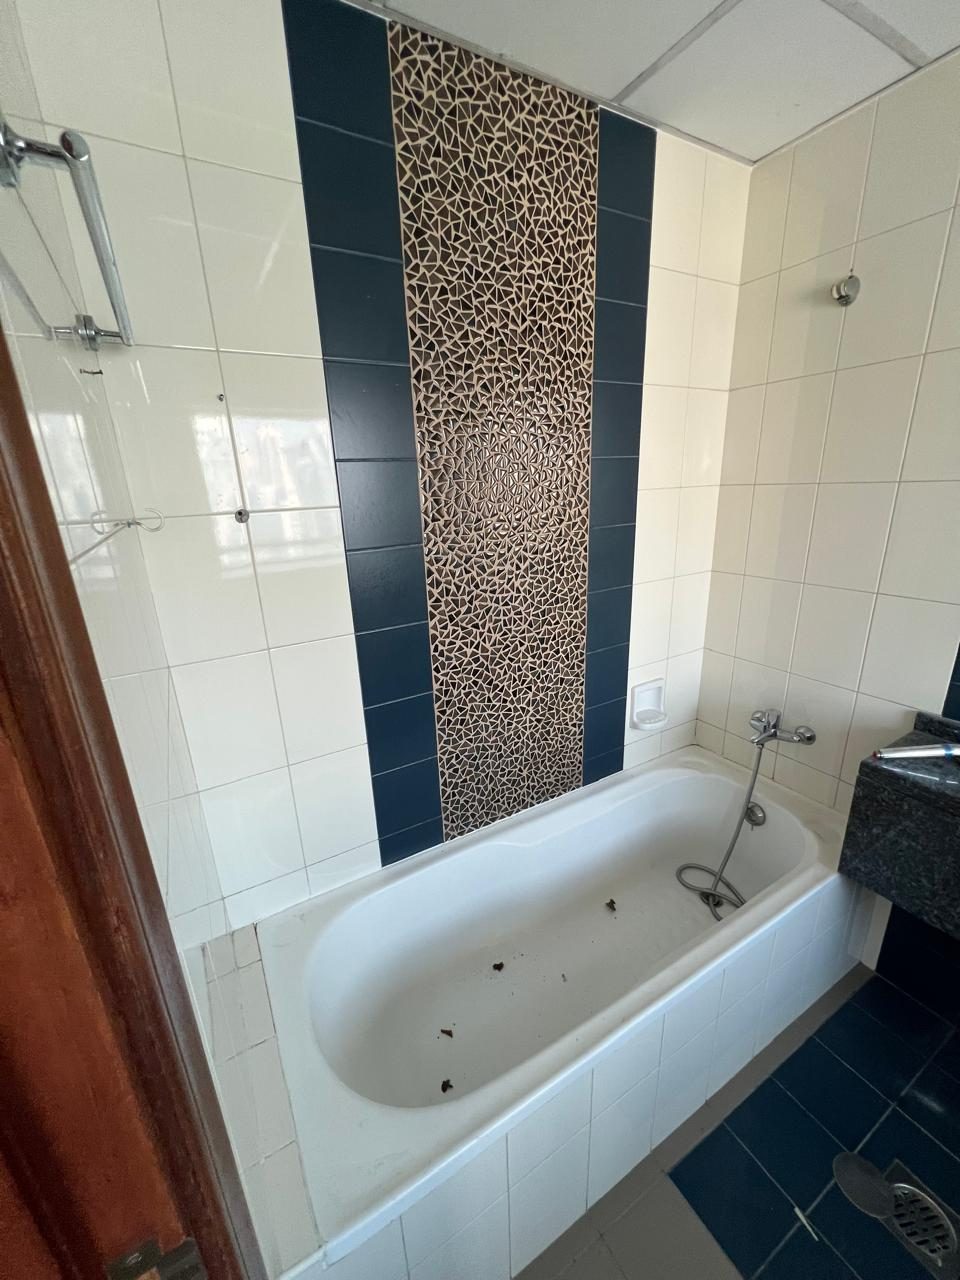
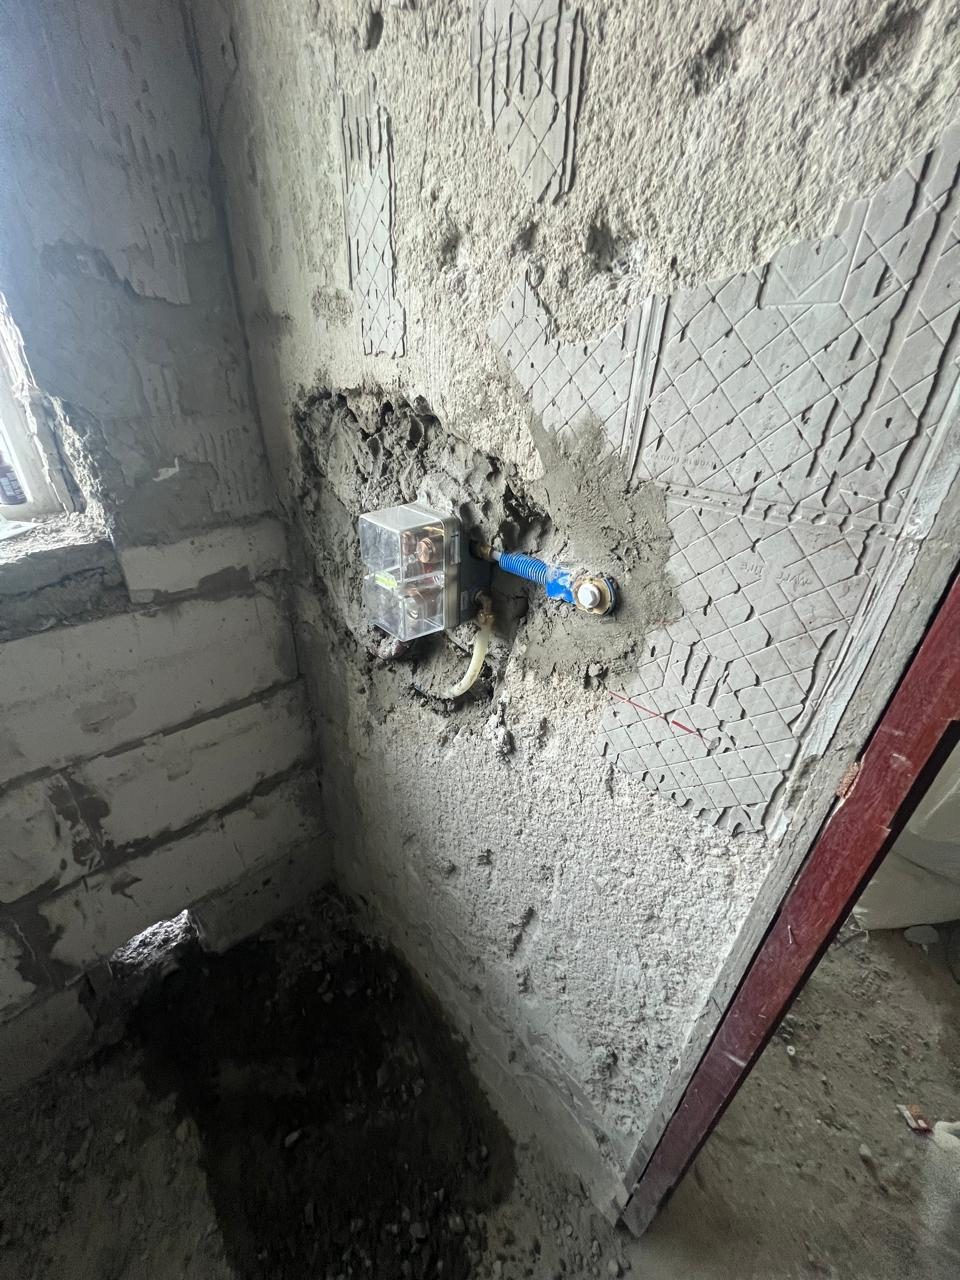
Bedroom 2 bathroom

The original bathroom was stripped to the walls and cut for new concealed valves.
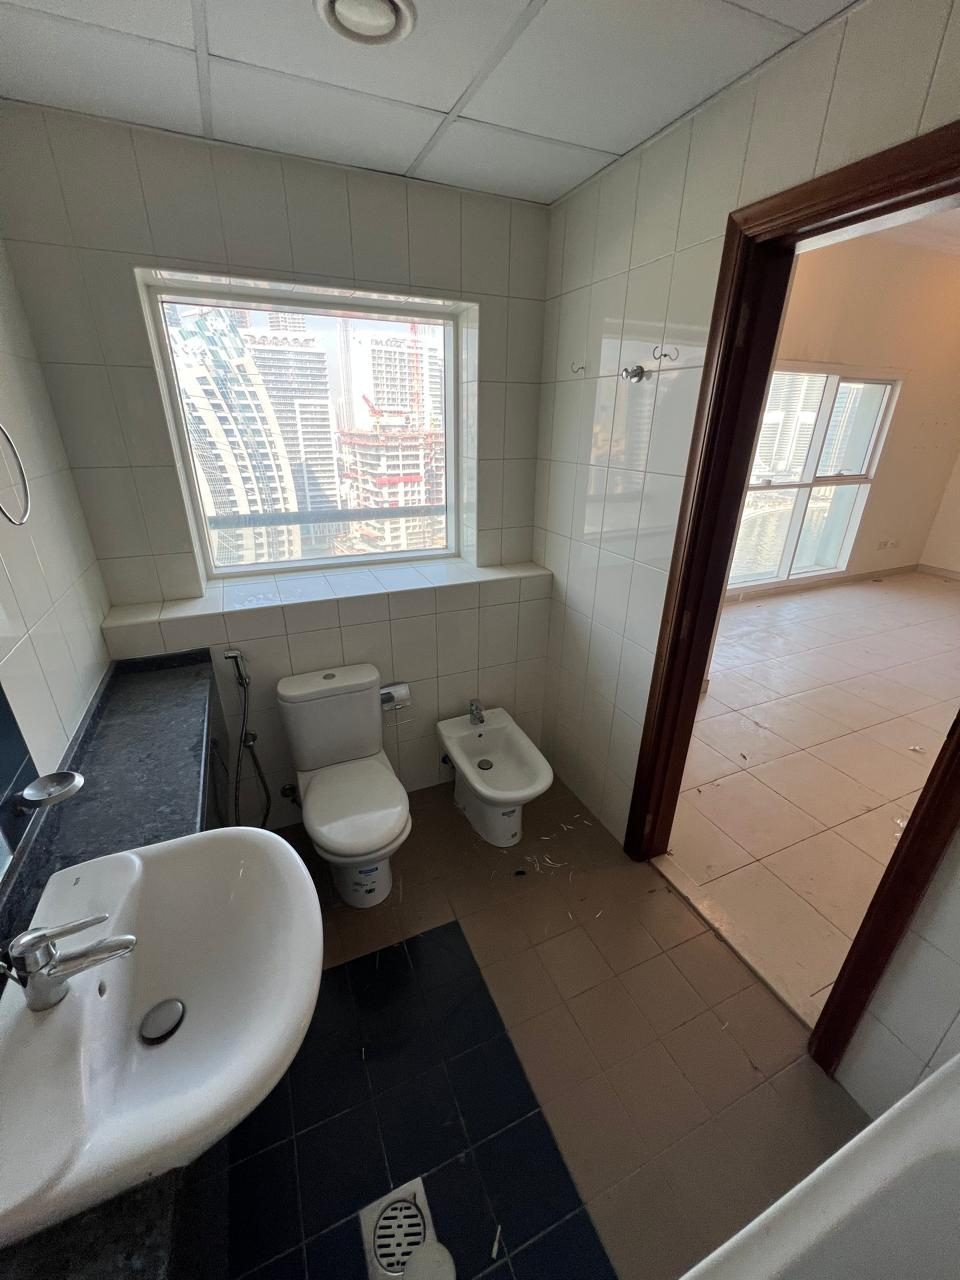
Bedroom 2 bathroom before the works, original sanitaryware and windowBefore
The bedroom 2 bathroom before the works.
Bedroom 2 bathroom before the works, original bathtub and mosaic feature stripBefore
The original bathtub and mosaic strip.
Bedroom 2 bathroom stripped to the wall, opening cut for a concealed mixerStrip-out
Stripped to the wall and cut for a concealed mixer.
Bedroom 2 bathroom: concealed valve body set into the wall beside the windowIn progress
A concealed valve set into the wall beside the window.

Bedroom 1 bathroom

This was a kitchen. We converted it into the bedroom 1 bathroom, with new supply lines and a concealed cistern.
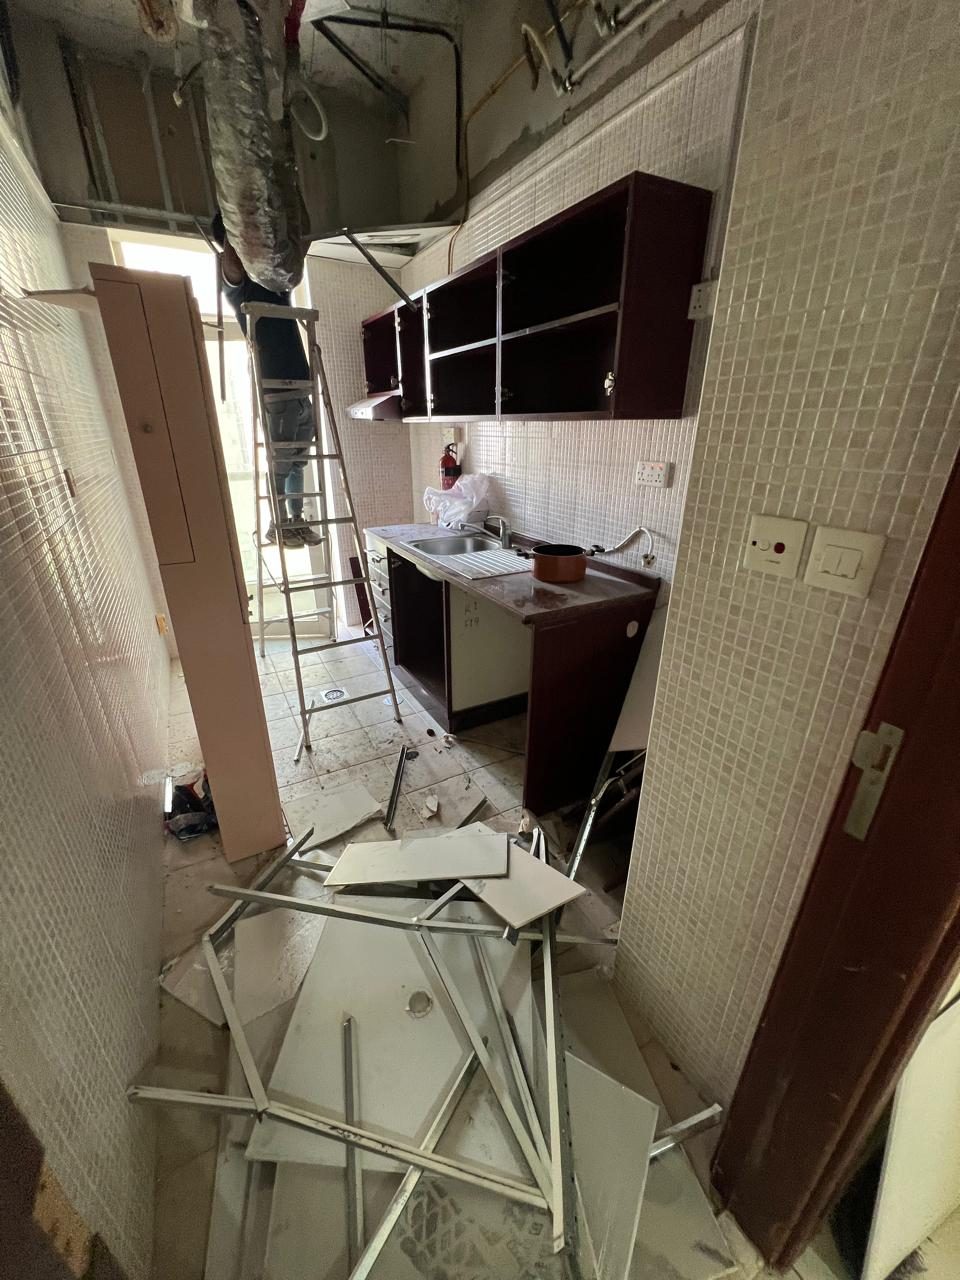
Old kitchen with the ceiling taken down, the space later converted into the bedroom 1 bathroomBefore
This kitchen became the bedroom 1 bathroom.
Bedroom 1 bathroom with new supply lines and a concealed cistern frame against stripped wallsIn progress
Bathroom 1 taking shape: new supply lines and a concealed cistern frame.

Guest bathroom

We opened the wall on the left into the living room. In front, we took out the whole wall and built a new one for the guest washroom.
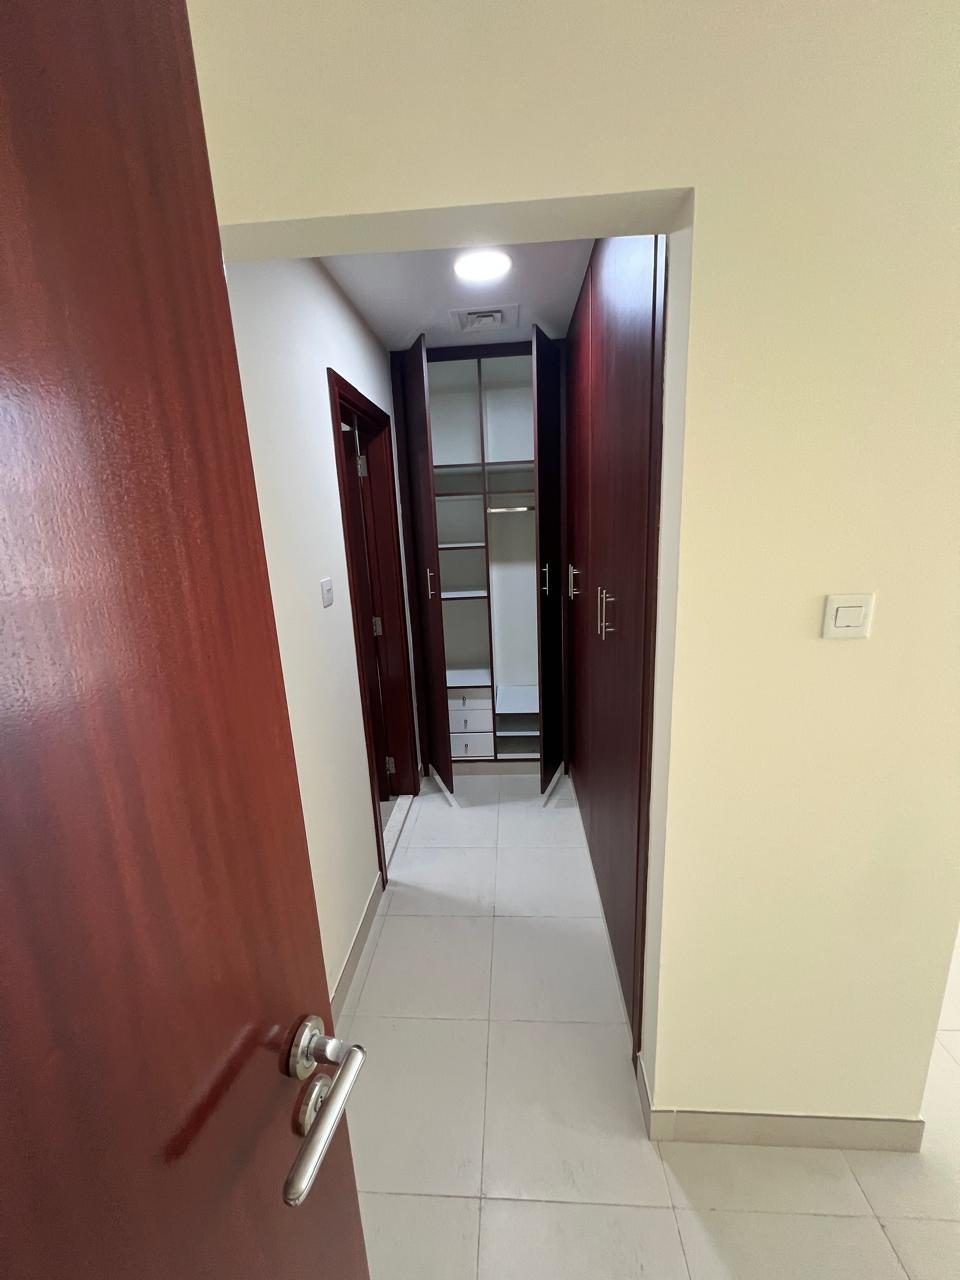
Passage with fitted wardrobes before the works, later opened to the living room and rebuilt for the guest washroomBefore
The wall on the left opened into the living room; the wall in front was rebuilt for the guest washroom.
Team member inside the new blockwork walls of the guest bathroomIn progress
The guest bathroom in the making, in new blockwork.
Scope

What the job covered.

  1. 01Two apartments converted into one penthouse
  2. 02Structural openings
  3. 03New MEP
  4. 04Modern sanitary fittings
  5. 05Consultant and authority approvals
About these photos

The before and work-in-progress photos are from our site team on this project. The finished photos come from our handover set and were matched to the same rooms by their walls, windows and doors; they were taken close to handover, so a few still show protection film and materials. Nothing is retouched; two dark photos had their exposure lifted slightly.

Services on this project

Joining two units,
or opening one up?

Send the drawings, the address or just the idea. Within 48 hours you have a site visit booked, and after the visit a written scope and a price you can hold us to.

Tell us about your project See all projects
Tell us about your project